As many of you know, ShopWP does not handle the payments and checkout process. Customers using ShopWP are instead sent to the default Shopify checkout page to finish the order.
One of the drawbacks to this approach is losing the ability to track where users came from during their purchase journey. Since the WordPress site and Shopify checkout pages are on different domains, the analytics tracking is complicated or lost altogether.
Thankfully, enabling this cross site tracking for ShopWP is pretty easy. In this article I’ll walk you through the whole process and get your analytics tracking working again.
So let’s begin!
Installing Google Analytics on WordPress
In order for the cross site tracking to work you must have Google Analytics installed on your WordPress site. Whether you’re using Google Tag Manager, adding the analytics embed script directly, or leveraging a plugin—the method doesn’t matter.
Just make sure it’s the same Google Analytics account that you want to connect to Shopify.
You should only be using one Google Analytics account.
Installing the Google Shopify app
After installing Google Analytics on WordPress we’ll also need to install it on Shopify.
The first thing you need to do is install Google’s Shopify app. This app will take care of sending the important ecommerce data into Google Analytics automatically for you. Nice huh?
First, login to your Shopify store.
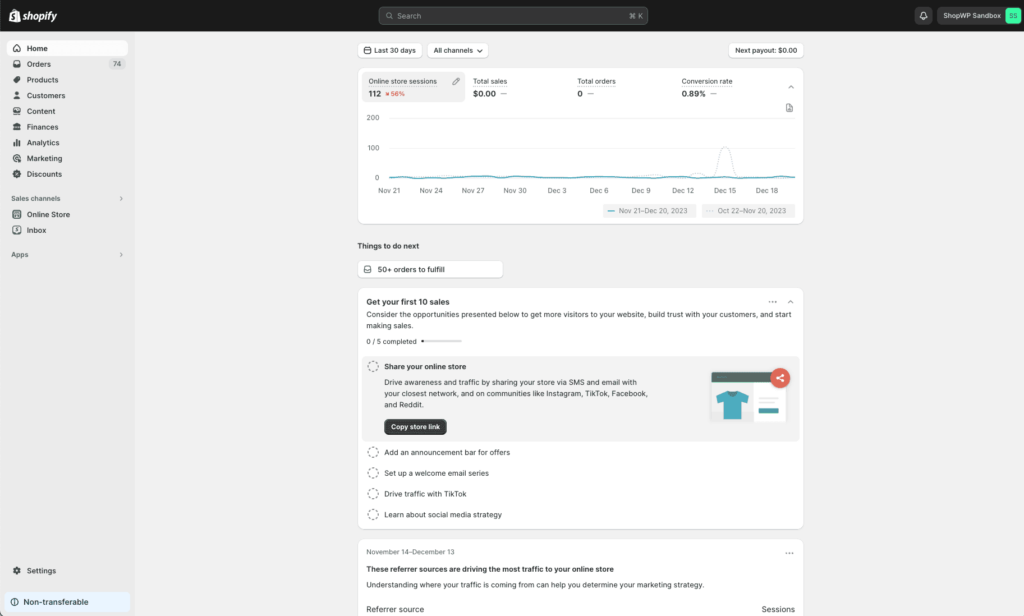
Once you’re logged in open a new tab and go to https://apps.shopify.com. Find the search bar, type in Google, and hit enter.
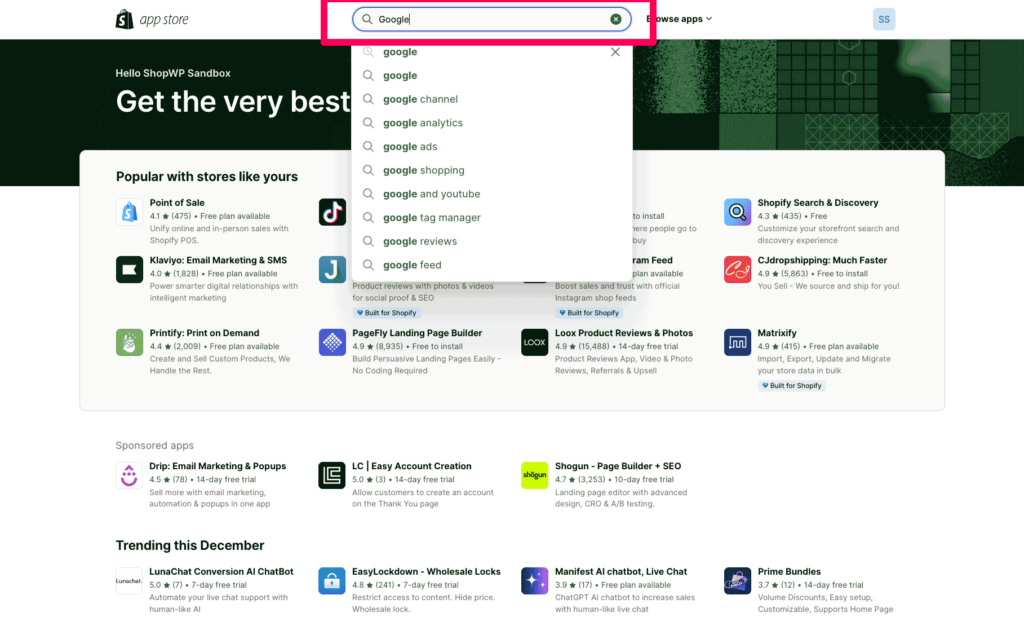
On the search results page look for the app called Google & YouTube. It should be the app with the Google logo. See screenshot below.
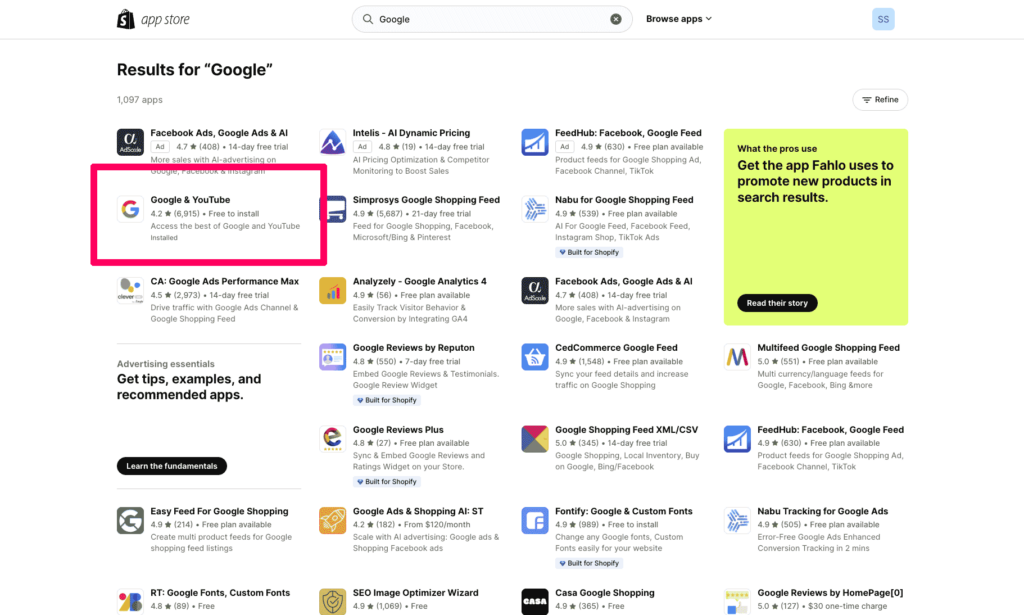
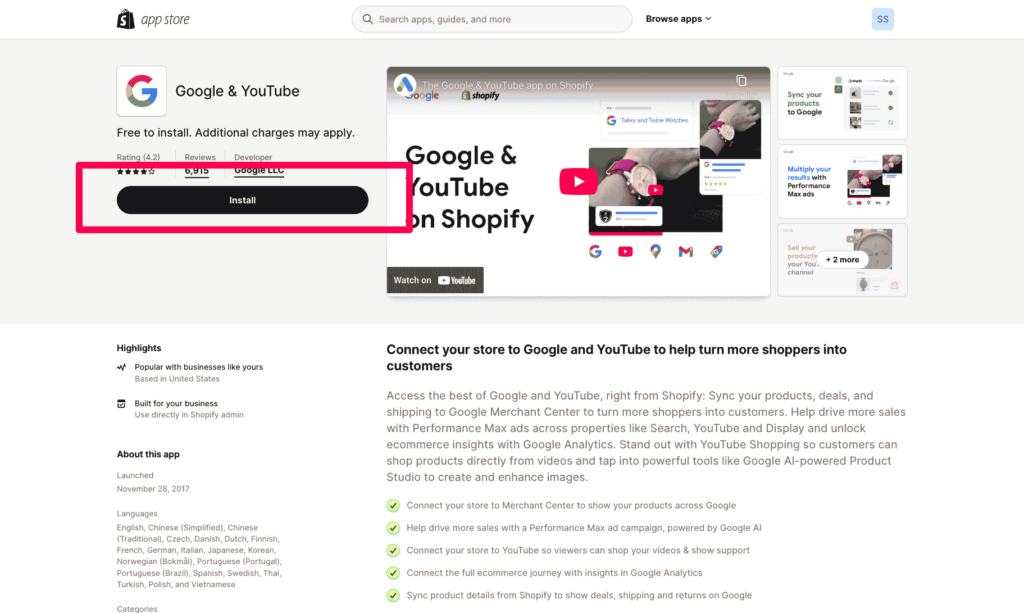
Finally, click the install button and follow the steps in the installation wizard to complete the process.
After installing the Google & YouTube app you’ll need to configure it. To do this, open the app and go through the connection wizard to connect your Google account to Shopify.
After the connection wizard finishes you should see your Google Analytics property listed on the app page. See screenshot below.
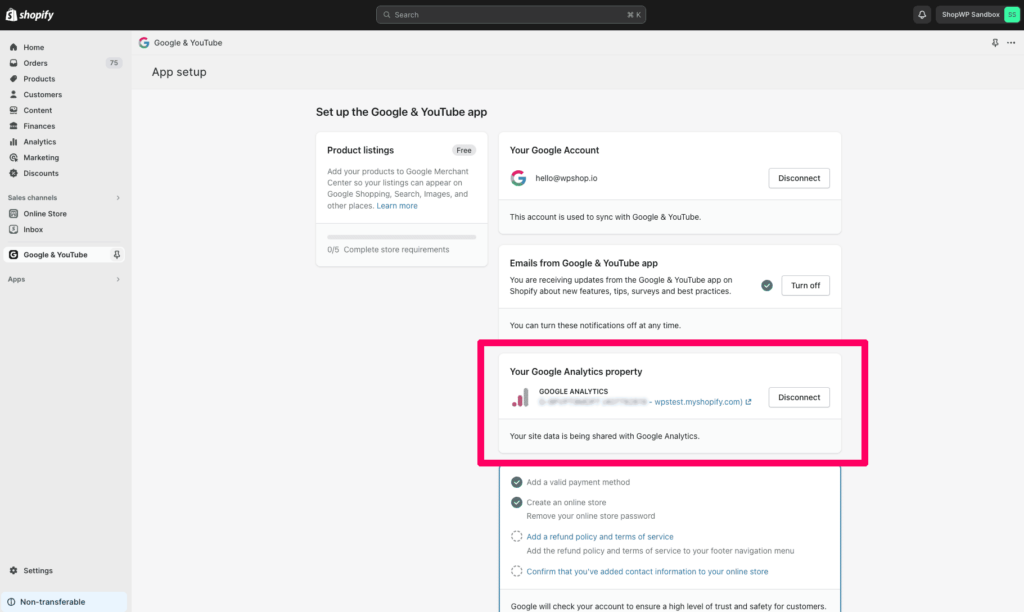
Finally, be sure to go to Online Store -> Preferences -> "Manage pixel here", and click the button to complete the configuration.
At this point you’re all set. Now it’s time to configure your Google Analytics settings.
Configuring your Analytics Account
The second step to make cross site tracking work is configuring your Google Analytics account. You won’t need to configure a lot so it’s pretty easy.
We’re going to add both the WordPress (and Shopify) domains to your data stream.
Let’s step through it.
First, open your Google Analytics account and click the “Admin” settings link.

Next, click the Data Streams option like the screenshot below.

Click the specific Data Stream that relates to your account.

Once inside your Data Stream scroll down to the bottom and click the Configure tag settings option.

In the next screen click the Configure your domains option

Finally you should see a screen that allows you to specify domains. Make sure to enter both your WordPress domain and your Shopify domain. Even if you’re not using the “.myshopify.com” domain for checkout, make sure to add that as well. It should look something like this when you’re done:

You can also leave out the https and www parts of the domain.
After you’ve gone through the two steps above you should be done! The next step will involve testing that the cross tracking is actually working.
Testing the cross site tracking setup
To test that the cross site tracking is working, make sure to go through the above two steps first. Also make sure you’re on at least version 8.3.0 or greater of ShopWP.
During this process we’ll be making a test purchase in Shopify. So be sure to create a 100% off discount code beforehand, or enable test credit cards in your Shopify account.
First, clear your browser cache and navigate to one of your product pages on WordPress.
Second, add something to the cart and click the “Begin checkout” button to start the order.
You should be redirected to the Shopify checkout page. Go through the full checkout and purchase the product as a test.
After purchasing, open your Google Analytics account and click the Reports icon.

From there, click the Realtime section. You should see the ecommerce data for the purchase you just made in the boxes.

Look under the Events column and click the event name: begin_checkout
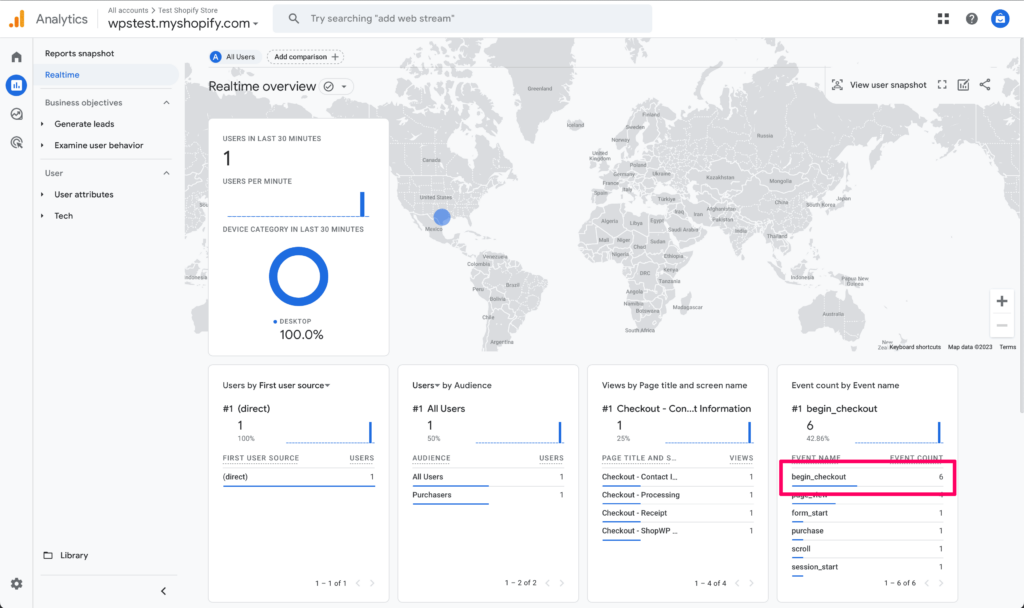
A new list should populate. You’ll want to click the Next page option.

On the second page click the page_referrer option

You should see your WordPress domain listed which confirms that cross site tracking is working properly.

If you don’t see the correct domains listed here, try waiting 10minutes or so. Sometimes there can be a lag in the realtime Google data.
Another thing to double-check is whether you have Google Analytics installed on your WordPress site. Google Analytics must be installed here as well.
Conclusion
That’s all there is to it. Thankfully Google has made this process much easier in Google Analytics 4.
Just remember that the important pieces are:
- Installing and configuring the Google Shopify app
- Adding all of your appropriate domains to the Google Analytics account
If you get stuck during at any step of the process please reach out and I’ll be happy to help.
