

Starting in version 5.0 ShopWP Pro now comes with the ability to translate your product content into different languages and currencies. These two features are known as the “translator” functionality, and is ready to use today.
In this article, we’ll explore how to set this up and what to expect when using this feature.
Requirements
Before you can use the ShopWP Translator functionality, you’ll need to meet a few requirements. Shopify does not provide content translations natively, but instead relies on third-party apps to do this. So after installing a translation app, you’ll need to translate your product content there.
The main requirements are:
- ShopWP Pro
- The Basic Shopify plan or higher
- A third-party Shopify translation app to translate your content
- Shopify Payments (if you want currency conversions)
- If updating from a version less than 5.0, you must reconnect your Shopify store.
I should note that you can continue using a WordPress plugin to translate the rest of your content. You’ll only need the third-party translation app for your product-specific content.
How it works
In order for your Shopify store to support multiple languages and currencies, you must first “whitelist” them inside Shopify. ShopWP will then recognize these settings and update the WordPress content accordingly.
ShopWP does not maintain it’s own list of countries, languages or currencies. This may confuse you when loading the plugin settings and only seeing United States / English. You will only see the languages and currencies that you have enabled inside Shopify.
Ok, let’s start setting this up!
Creating a new Shopify Market
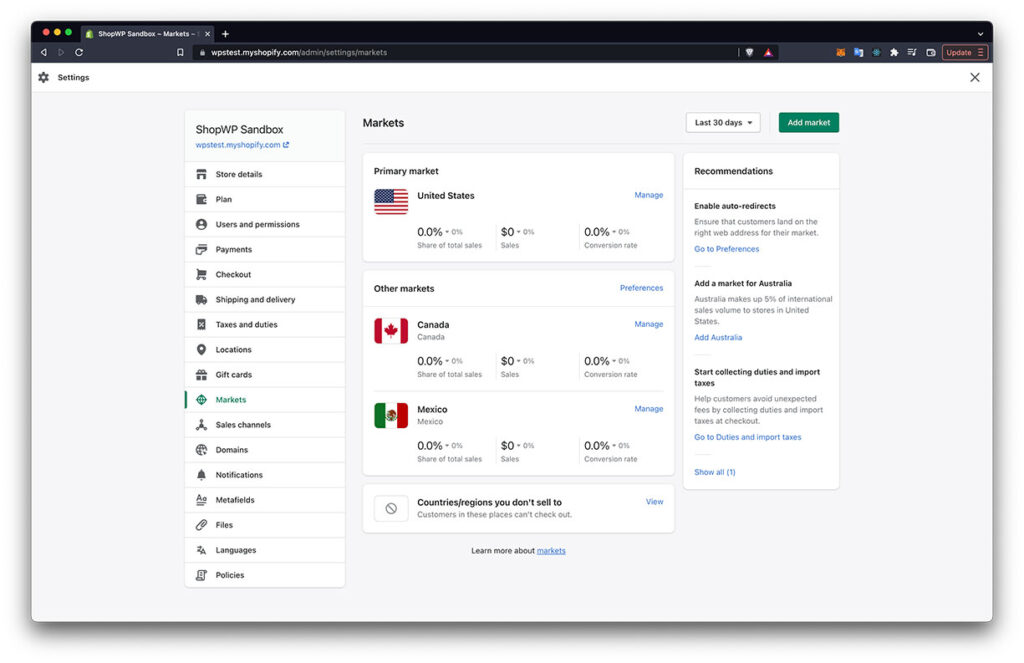
Shopify Markets is a relatively new feature which allows you to manage the experience of your store across different countries and regions. This will be the central place you go to configure your settings for each country. Let’s begin by accessing it.
First, open your Shopify settings and click the side link called “Markets“. Depending on your existing setup, you may only see one market listed.
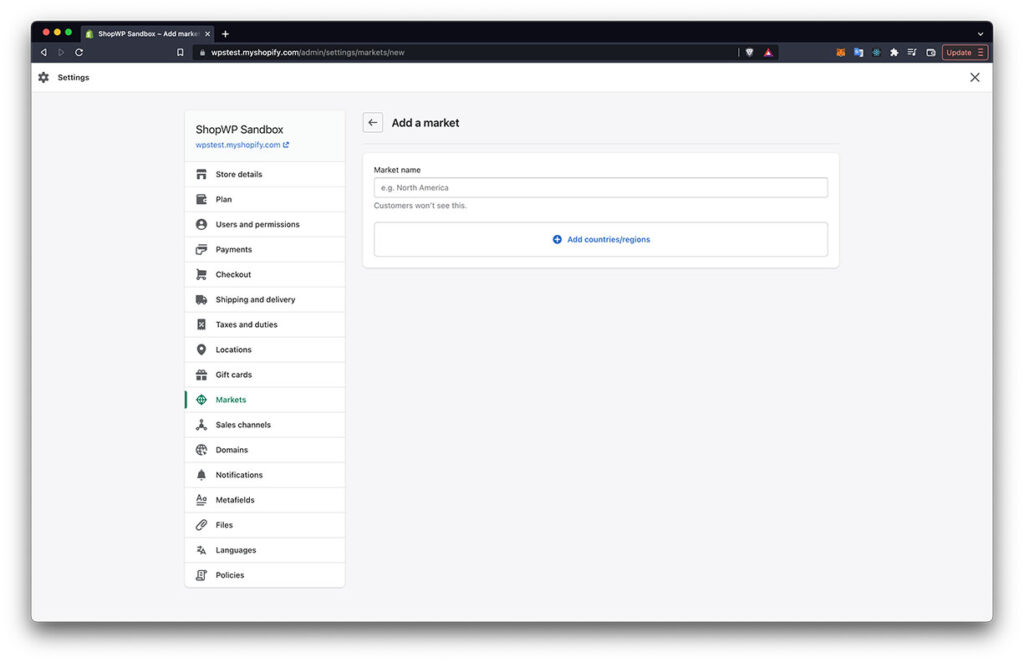
Then click the Add market button to begin setting up a new market.
Now give your Market a name. This can either be the name of the country or region you want to add. For this guide I’ll create a new market for Japan.
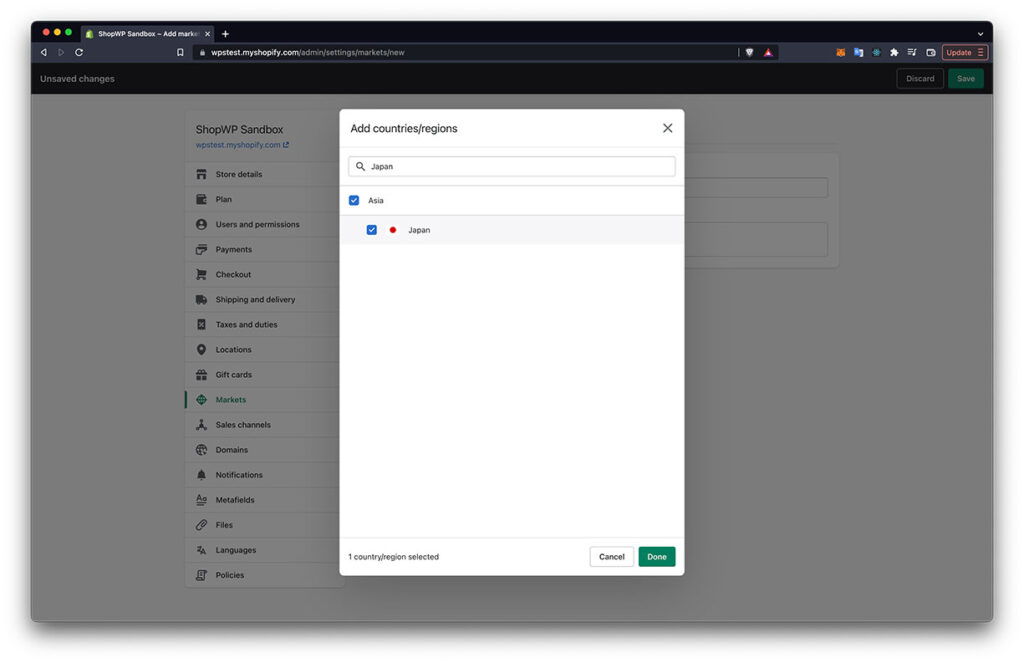
Now click the Add countries/regions button.
After adding your region click done to exit the modal. You’ll then click the Save button in the top right corner to finish.
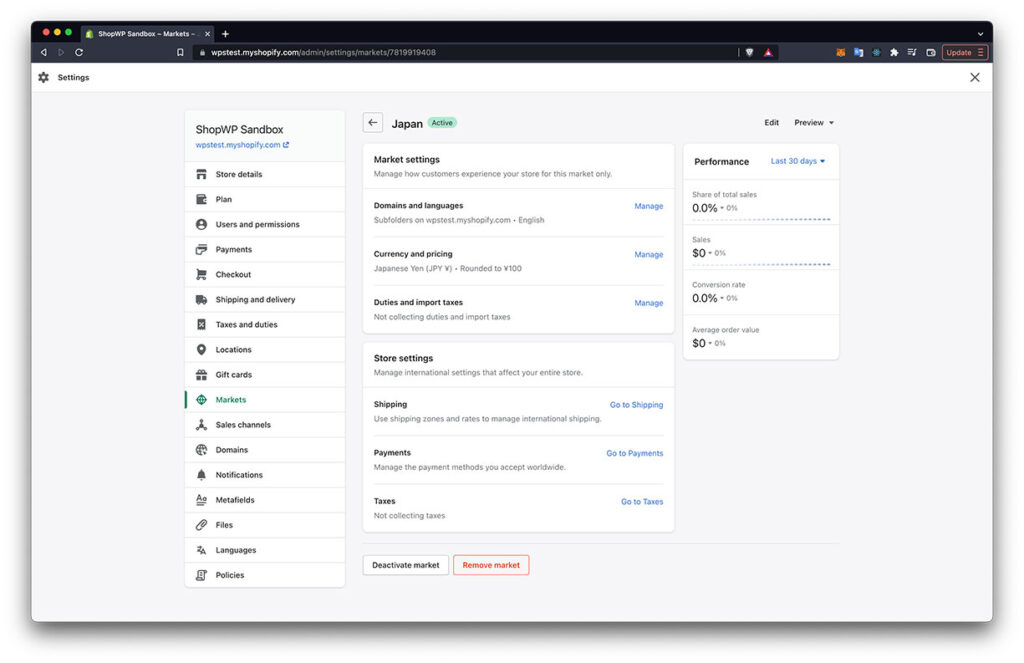
Now you should see the main edit screen for your new Market. This will be the place where you can add languages, currencies, shipping info, etc.
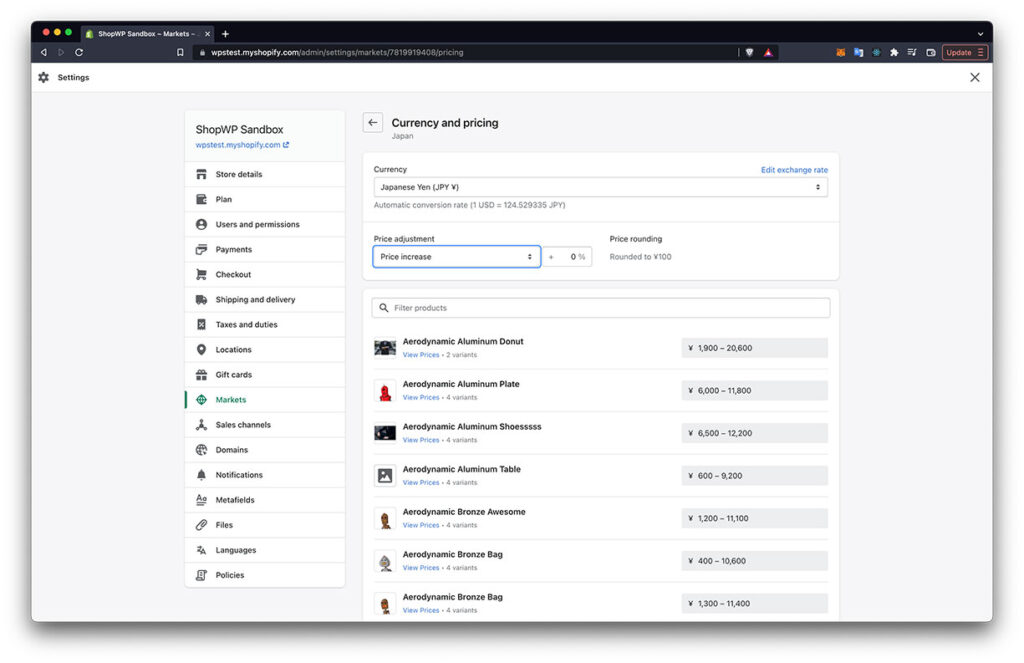
Adding a currency to your Market
Now that you have your new market created, you’ll need to make sure you have the proper currency assigned to it. This will be the currency that ShopWP uses as well.
Within your market edit screen, click the Manage link next to Currency and Pricing.
Shopify will attempt to find the currency automatically based on the region you chose earlier. If this isn’t the currency that you want to use, you can change it here. You can also adjust the prices of your products.
It’s important to note that you can only assign one currency to every market.
How currency conversion works
One of the nice features of the new translator functionality is that ShopWP will lean on Shopify for all the heavy lifting–including currency conversions.
After switching currencies within the ShopWP settings, your product prices will be automatically converted into the currency you selected. This is done by Shopify using the current market exchange rate at the time.
For more details, read the Pricing in local currencies article from Shopify.
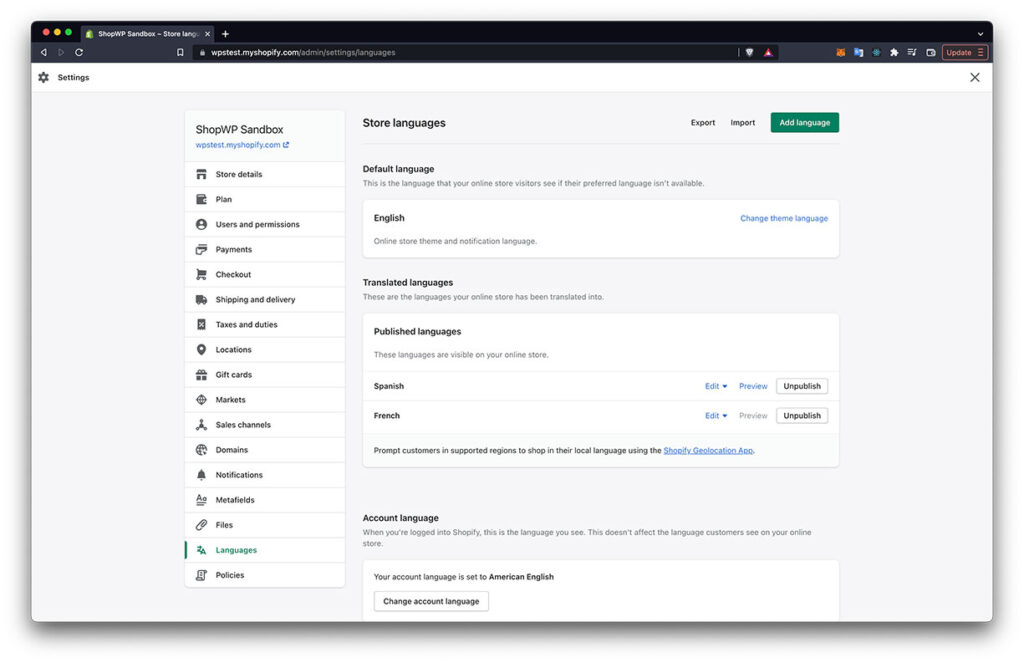
Adding languages to your Market
Every market you create can have one or more languages assigned to it. It will use your store’s default language automatically unless you change it. Shopify has written a nice guide that you can read on this.
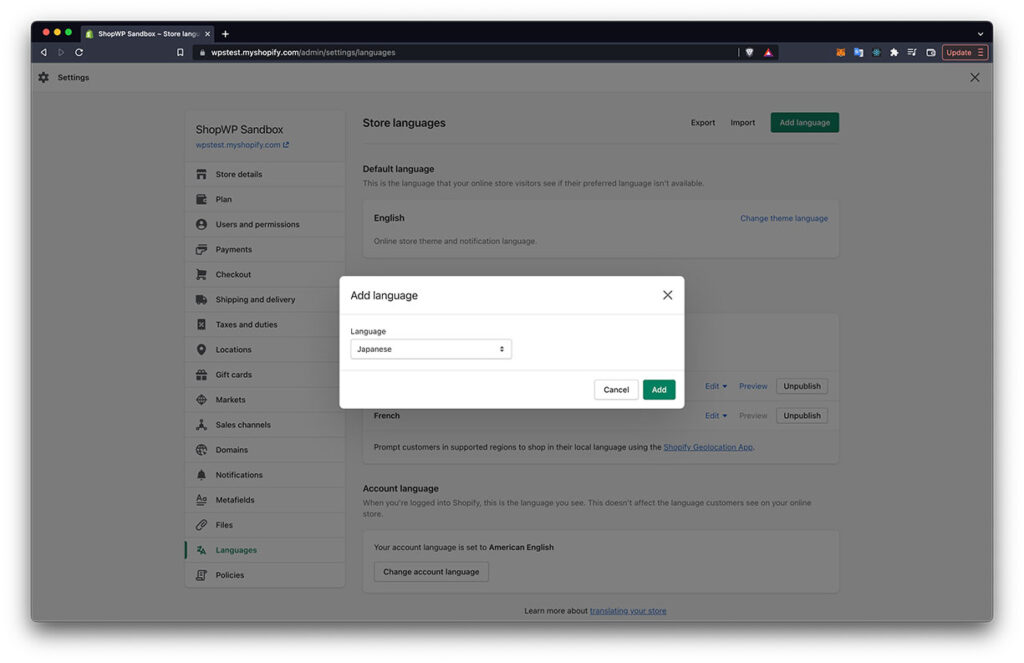
Let’s add the language Japanese to our newly created market for Japan.
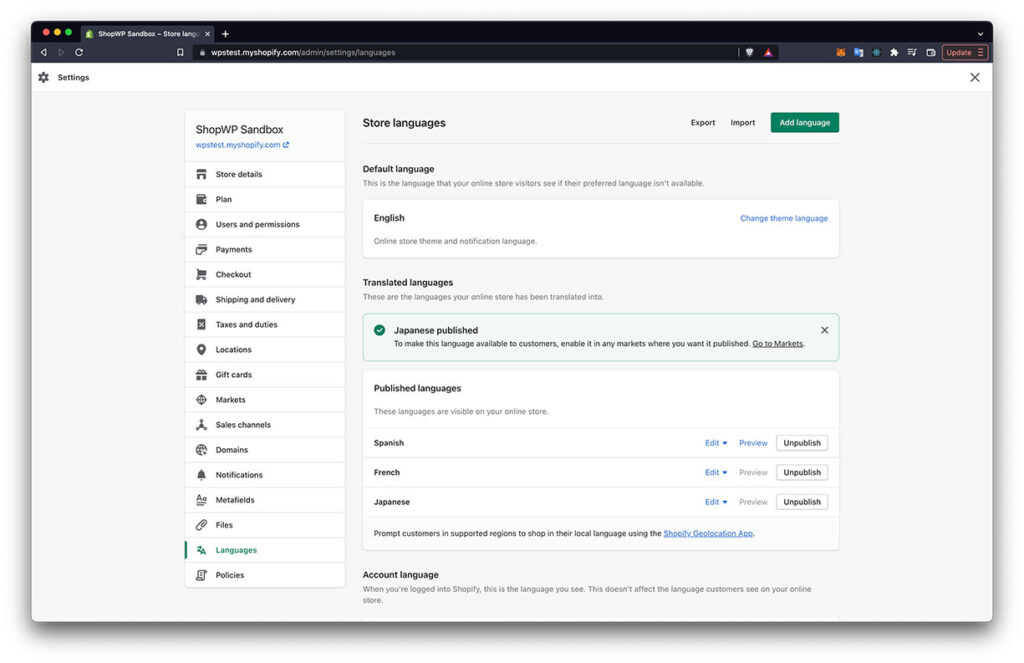
Begin by clicking the Languages side nav link.
From there, click the green Add language button in the top right corner.
Next, choose the language you want to add.
The next step is important. It tripped me up at first. After adding the language you must manually publish it. You can do this on the same screen (see below screenshot).
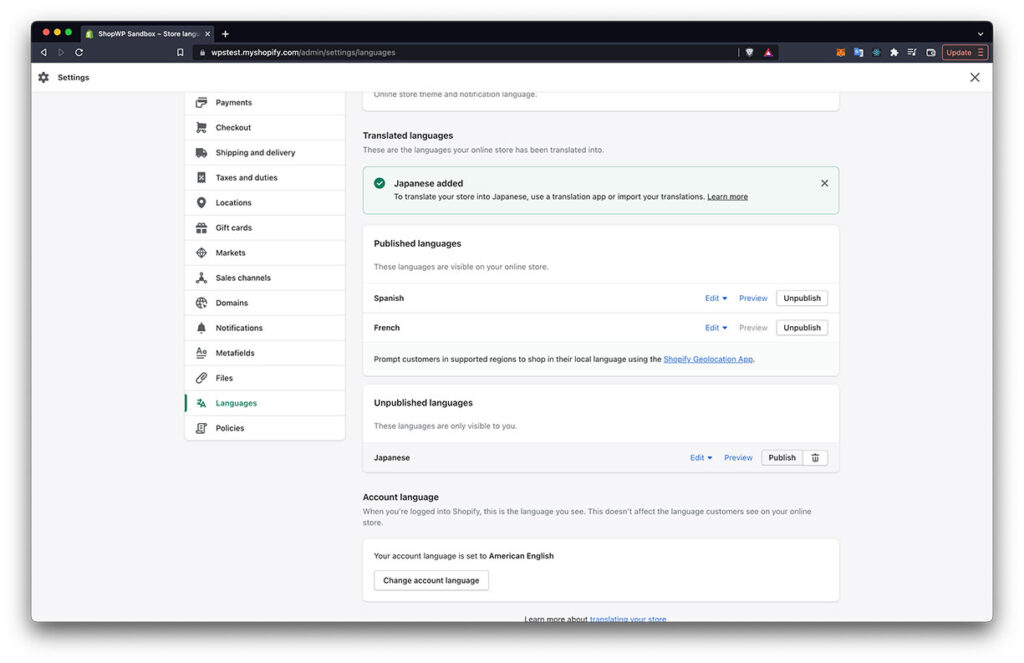
After publishing, your new language will show up under the “Published languages” section. It should also give you a success notice.
Now that you’ve created a new language and set it to Published, you’ll need to tell your market to use it. To do this, go back to the Markets section and click the manage link to edit your market.
From there, click the manage link next to the “Domains and languages” section.
Scroll down and you should see your new language! Select it and click the save button.
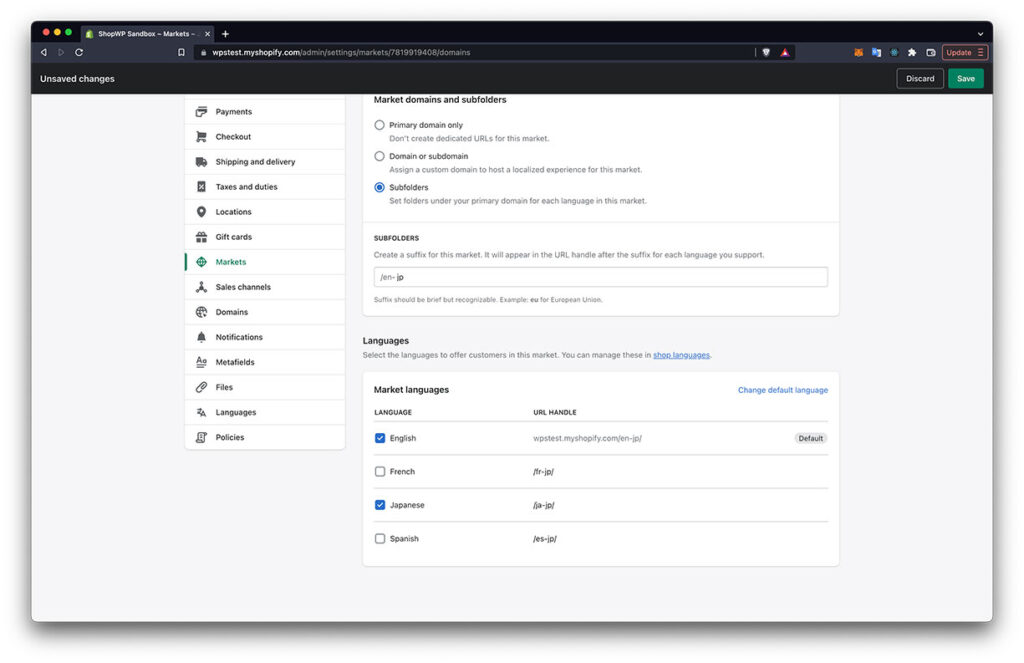
Your market will now use your new language with ShopWP.
The only thing left to do is translate your product content by using a third-party Shopify app. Remember, Shopify will not automatically translate your content. You must translate everything using a separate app.