

In this article, I’m going to walk through how to track custom ShopWP events inside Google Analytics 4 (GA4) using Google Tag Manager (GTM).
For the purpose of demonstration we’ll be tracking a simple “add to cart” event. However this same technique can be used for any ShopWP event.
Let’s get started!
Upgrading to Google Analytics 4
- Universal Analytics properties will stop processing new hits on July 1, 2023.
- 360 Universal Analytics properties will stop processing new hits on October 1, 2023.
I wanted to mention this as it’s pretty important.
If you haven’t started migrating yet, please start soon! You’ll need time to tackle it. 💪
With that said, tracking ShopWP events should work in the older Universal Analytics as well. However this guide will only focus on GA4.
Here are some great resources to help with the GA4 upgrade:
- Introducing Google Analytics 4: https://support.google.com/analytics/answer/10089681
- How to switch to Google Analytics 4: https://www.wpbeginner.com/wp-tutorials/how-to-switch-to-google-analytics-4-in-wordpress/
Deciding which events to track
The first thing to do before configuring the events is deciding what to track. You may already have an idea of which events would be useful, but I recommend making a list somewhere to reference later.
You can get very granular and specific with the tracking, so I recommend keeping it simple to start. That will prevent you from being overwhelmed.
Here is a short list of tracking ideas …
- Adding / removing products to cart
- Viewing products
- Begin a checkout
- Interacting with product variants
- Open / closing cart
Step 1 – Creating a GA4 tracking tag
As I mentioned earlier, I’ll be demonstrating how to track the ShopWP “Add to cart” event.
However before we can do that we need to configure Google Tag Manager and Google Analytics. This requires some setup, so let’s do that now.
To begin, open your GTM dashboard.
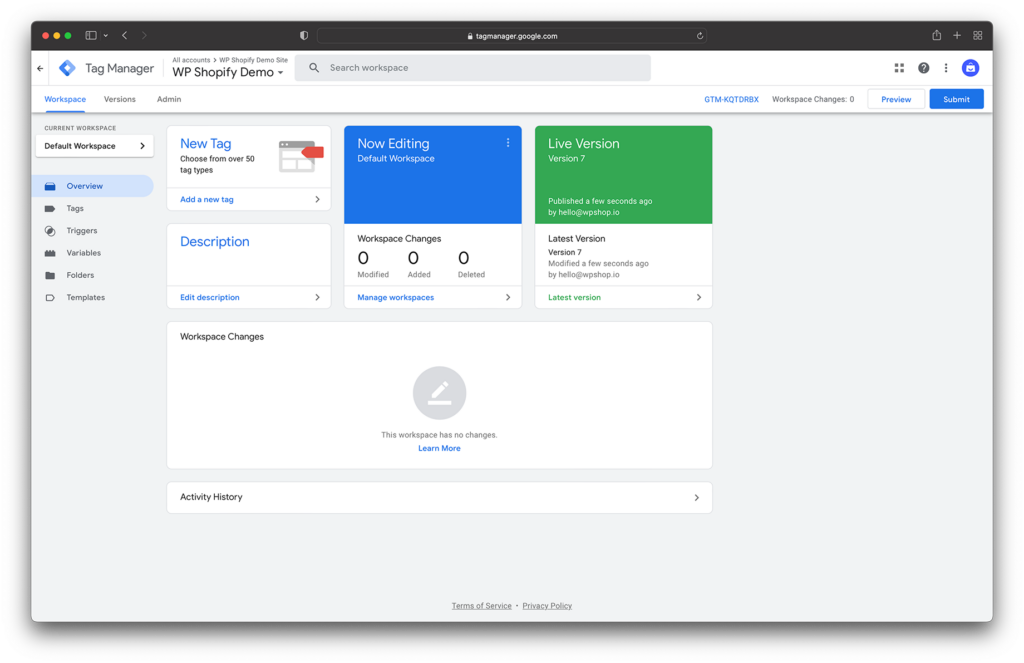
Now click Tags within the sidebar nav.
Create a new tag for the Google Analytics 4 configuration. This will allow you to embed GA4 into your website.
Note: If you already have GTM installed you shouldn’t need to do this. But if you’re using the old UA embed, you may need to remove that and replace it with GTM.
Within the tag edit screen, click Tag Type and choose Google Analytics GA4 Configuration.
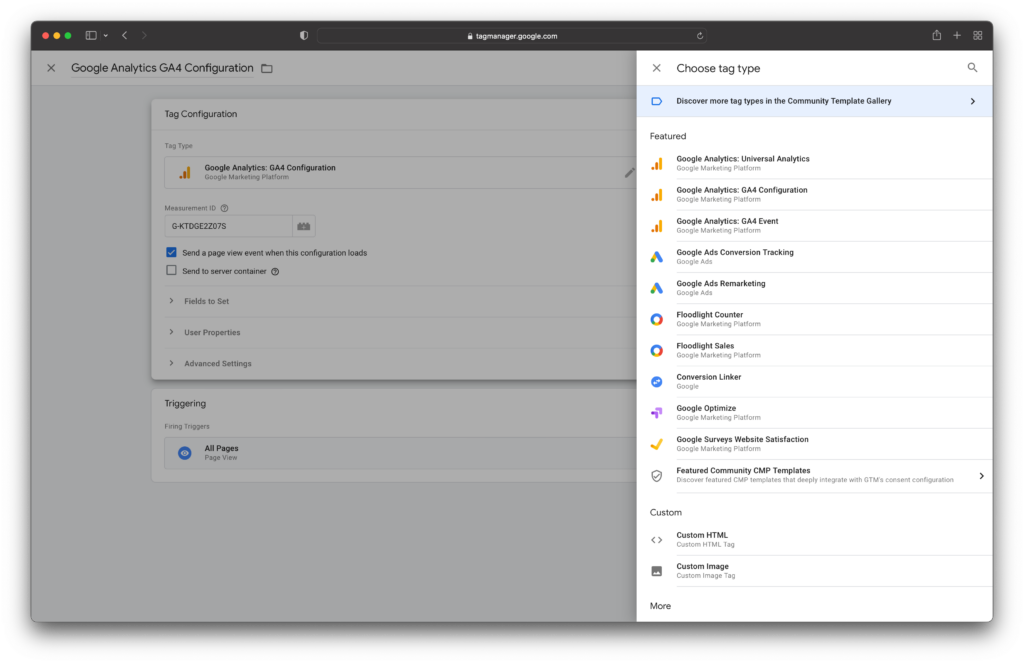
After bringing you back to the Tag Configuration screen, you’ll need to enter your Measurement ID.
To find your Measurement ID, you’ll need to open your Google Analytics dashboard. From there, click Admin – Data Streams. Then click your property name.
You should see a screen that looks like this:
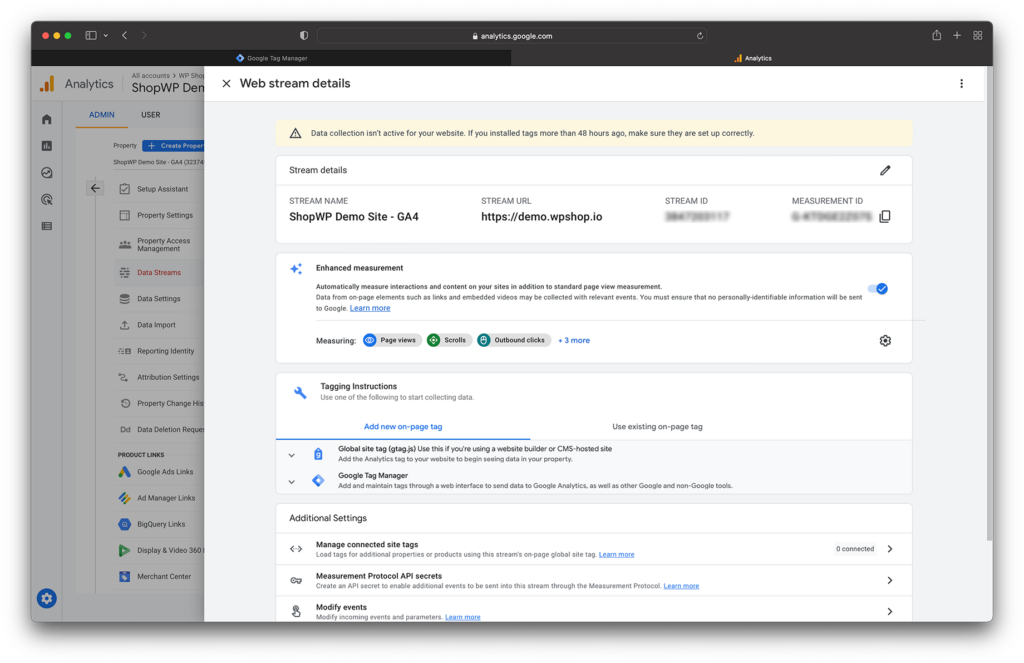
The Measurement ID can be found on the right-hand side.
Now head back to Tag Manager and enter the Measurement ID.
Next, click the Triggering section and ensure “All pages” is enabled.
Afterwards it should look like this:

Finally, go back to the Tag Manager dashboard and click the blue “Submit” button and publish your changes.
Now that you have a tag setup to add GA4 to your website, you need to add the actual GTM embed code to your site. If you’ve already done this you can skip to step 2. Otherwise, keep reading.
Go back to the GTM dashboard and click Admin. Then click Install Google Tag Manager within the container settings. You should see a screen that looks like this:
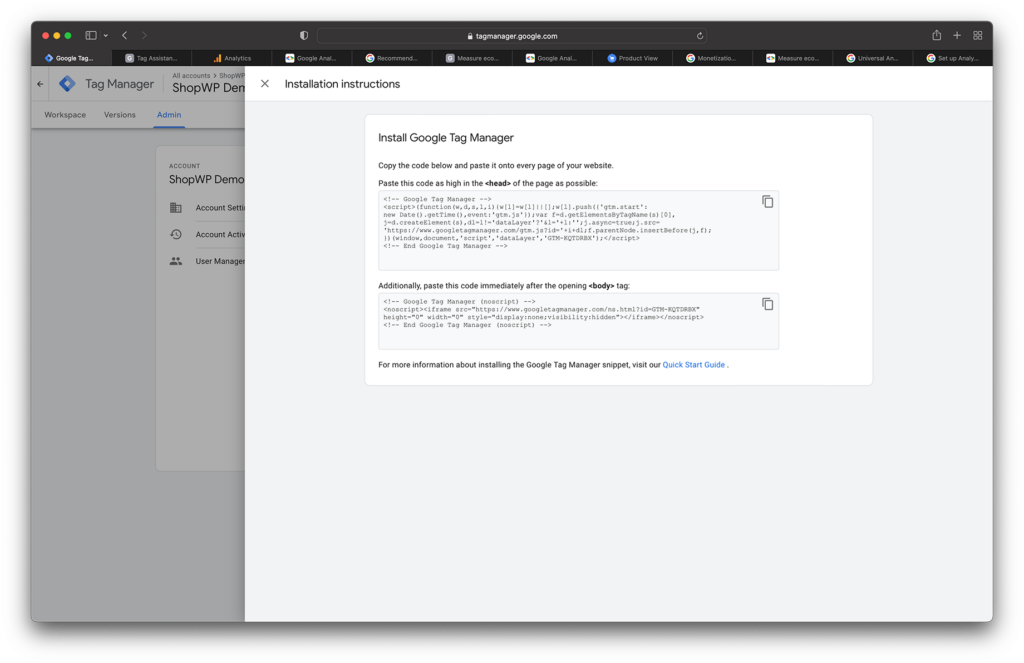
Follow the steps to install GTM on your site. Once you’re done we can start adding our custom event tag.
Step 2 – Adding Ecommerce GTM variables
Our goal is to pass additional data about the product when the “add to cart” event occurs. This will help us better understand which products are being interacted with.
To do this, we need to create a custom GTM variable to store this information.
Start by opening the GTM dashboard and clicking Variables. Then click “New” under the User-Defined Variables section.
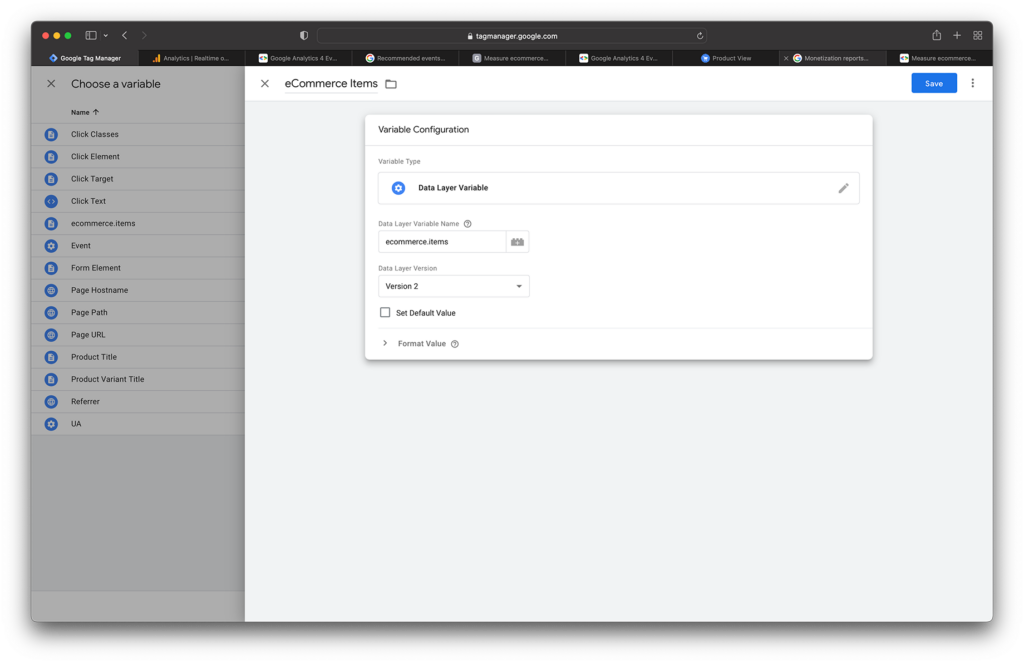
Give the new variable a name, such as “ecommerce Items”.
Next, click the Variable Configuration box and choose Data Layer Variable.
Set the variable name to: ecommerce.items.
It should look like this:
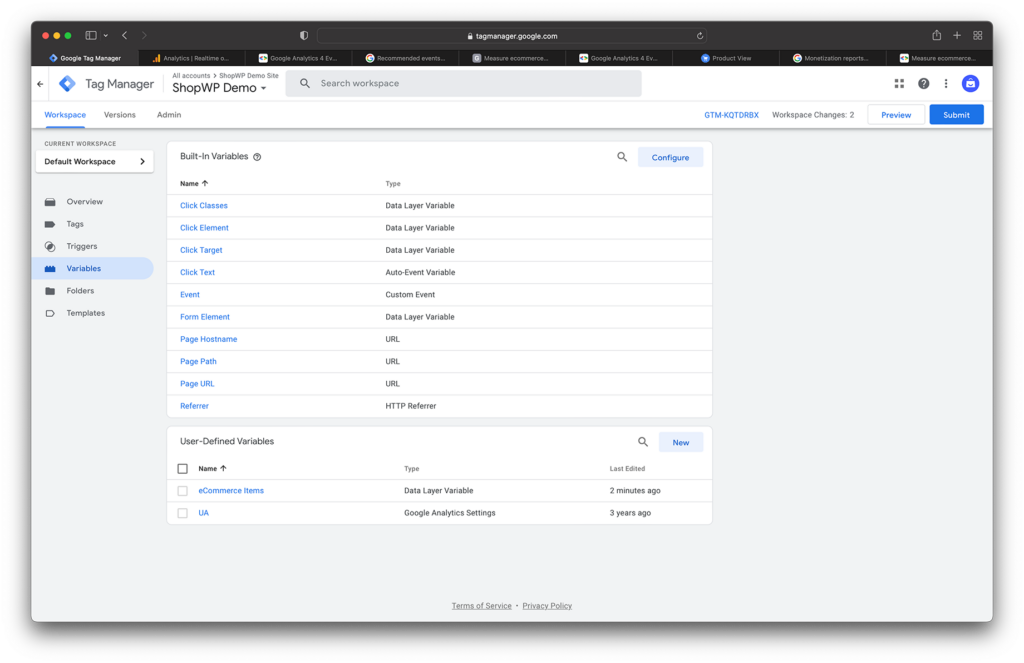
Click Save and you should see your new variable listed at the bottom. Make sure to publish your changes by clicking the blue Submit button toward the top.
Step 3 – Adding the custom add to cart event
Now that we have our GTM variable created we can create our custom event tag.
Wahoo! 🙌.
We’ll be following the same steps that Google describes in their measure ecommerce guide. I highly recommend giving it a read.
Ok, let’s start by opening the GTM dashboard and clicking Tags, then New.
Give the tag a name such as: ShopWP add to cart event
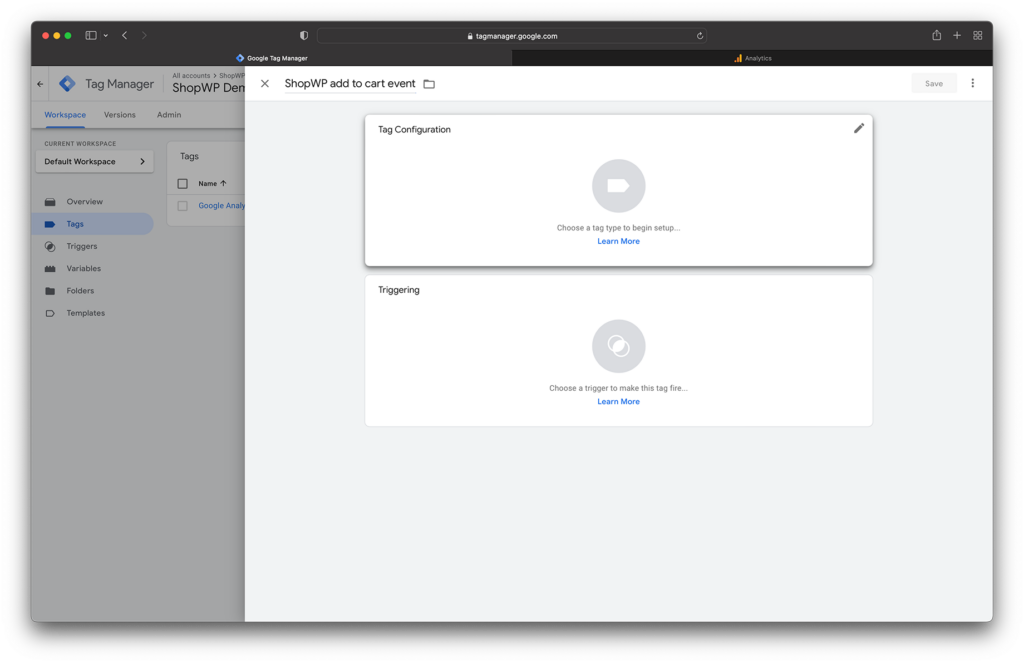
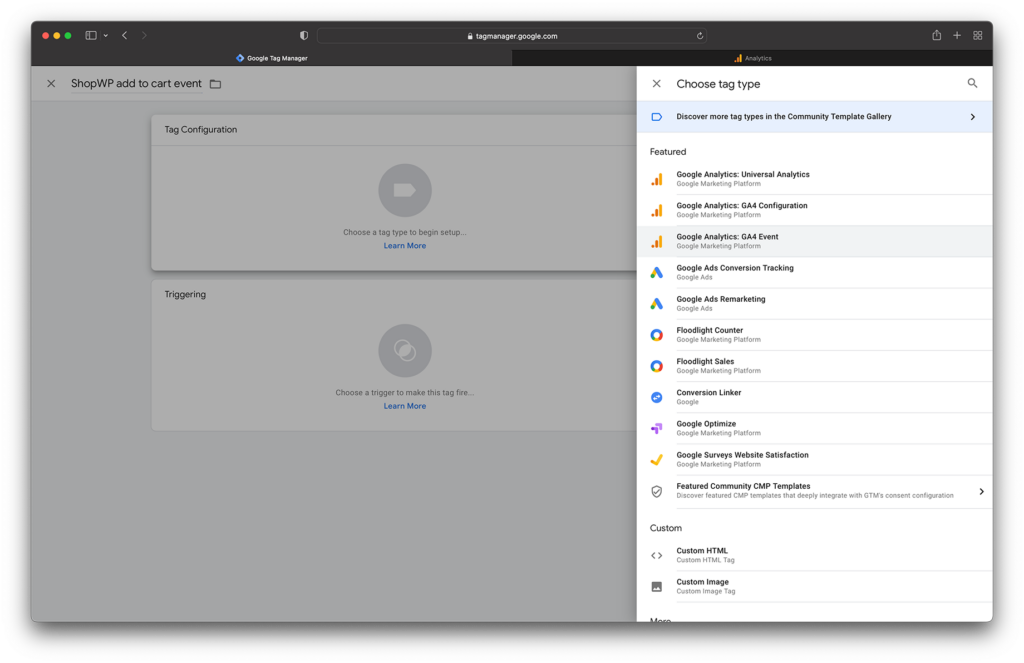
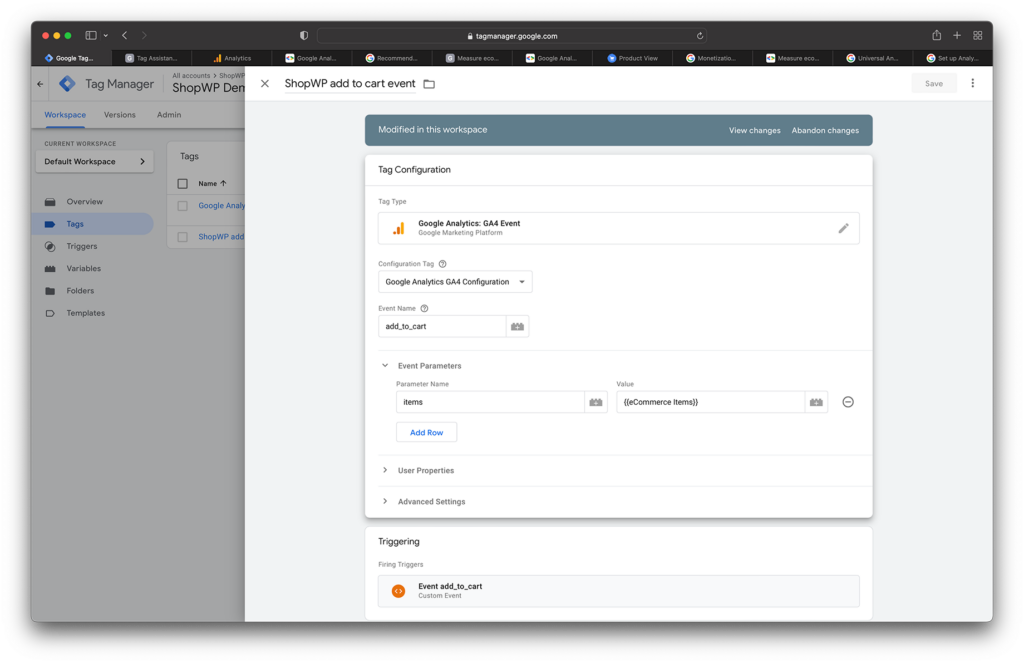
Next, click the Tag Configuration box and choose Google Analytics: GA4 Event.
Under the option “Configuration Tag”, make sure to select the GA4 configuration we created earlier. This will ensure that the custom event data is passed to Google Analytics.
For Event name enter: add_to_cart
The name add_to_cart is recommended by Google since it’s supported throughout the whole Google Analytics ecosystem as well.
For Event Parameters, click Add Row and set the Parameter Name to items.
Inside the value field, click the plus icon and choose the ecommerce Items variable we created earlier.
It should look like this:
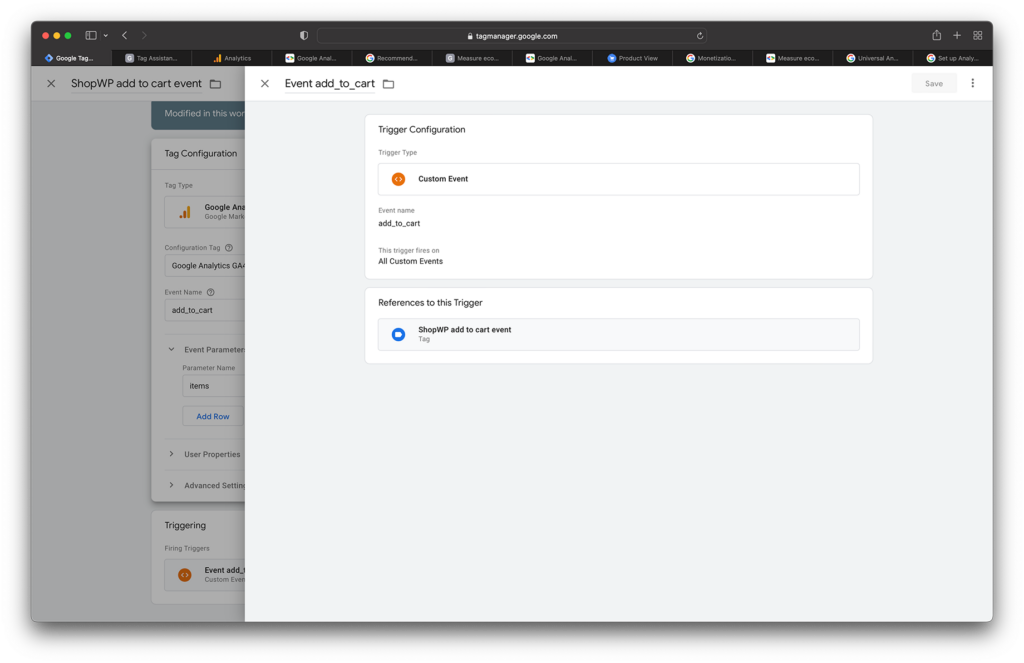
Next, open the Triggering section.
Within the Choose a trigger screen, click the plus icon in the top right.
Name the trigger: Event add_to_cart.
Within Trigger Configuration choose Custom Event.
Set Event name to: add_to_cart. (Note: this is important as it must match the event name in our tag.).
Finally, make sure the box “All Custom Events” is selected.
It should look like this:
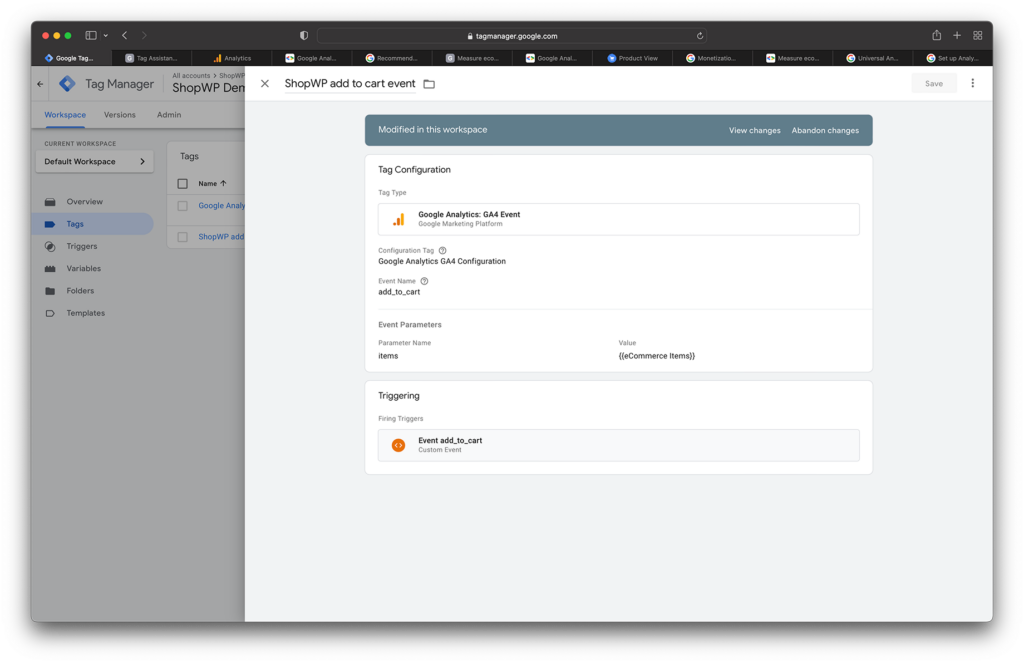
At this point you should have all the fields filled out for the custom event tag. Click Save and make sure to publish all your changes.
Step 4 – Running the add to cart event
So now that we have everything configured inside Google Tag Manager, the next step is to add some custom JavaScript to our WordPress site. This code will be responsible for “firing” the custom event and passing the data to Google Analytics.
Copy and paste the below code to your WordPress theme’s JavaScript. If you don’t know how to do this, I’ve written a detailed guide on setting up a custom JavaScript file that you can read through.
For a full list of available attributes to send, reference the GA add_to_cart event page.
wp.hooks.addAction(
	'on.afterAddToCart',
	'shopwp',
	function (lineItems, cartState) {
		if (lineItems.length) {
			dataLayer.push({ ecommerce: null }) // Clear the previous ecommerce object.
			lineItems.forEach(lineItem => {
				let variantId = lineItem.merchandiseId
				cartState.lines.edges.forEach(line => {
					if (line.node.merchandise.id === variantId) {
						const dataToPush = {
							event: 'add_to_cart',
							ecommerce: {
								currency: line.node.merchandise.price.currencyCode,
								value: Number(line.node.merchandise.price.amount).toFixed(2),
								items: [
									{
										quantity: lineItem.quantity,
										item_id: line.node.merchandise.id,
										item_name: line.node.merchandise.product.title,
										currency: line.node.merchandise.price.currencyCode,
										item_category: line.node.merchandise.product?.collections
											? line.node.merchandise.product.collections.edges[0].node
													.title
											: false,
										item_category2: line.node.merchandise.product?.productType
											? line.node.merchandise.product.productType
											: false,
										item_category3: line.node.merchandise.product?.vendor
											? line.node.merchandise.product.vendor
											: false,
										item_variant: line.node.merchandise.title,
										price: Number(line.node.merchandise.price.amount).toFixed(
											2
										),
									},
								],
							},
						}
						dataLayer.push(dataToPush)
					}
				})
			})
		}
	}
)
Here’s what the code is doing: we listen for the ShopWP “add to cart” event. When that runs, we’re calling some GTM code and passing the product data to Google Analytics.
Make sure this code snippet is added to your theme’s JavaScript and not the functions.php file.
Step 5 – Making sure everything works
Now that we have everything in place, let’s make sure it works.
Open the Google Tag Manager dashboard and click Preview. This will open a modal where you can type in your website.
Then click Connect.
This will open two pages: one for your website and another for the GTM Tag Assistant.
Now navigate to a page that displays a ShopWP buy button and add something to the cart. This can be any page with a ShopWP product.
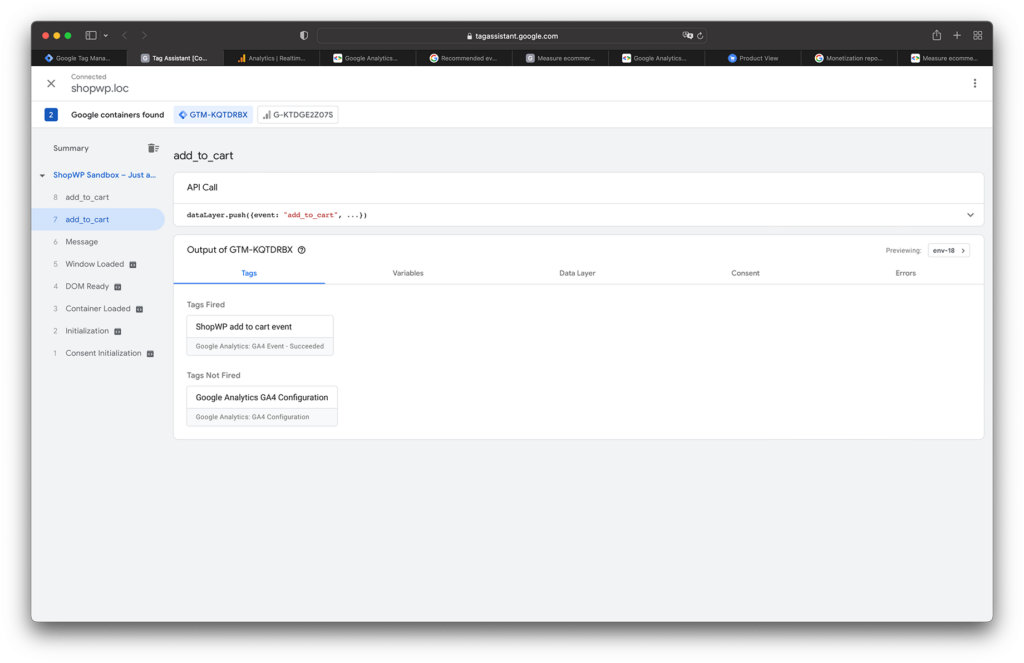
Afterwards, open the GTM Tag Assistant page. You should see the event listed on the sidebar like this:
You can also reference Google’s test ecommerce store to see how the data is structured.
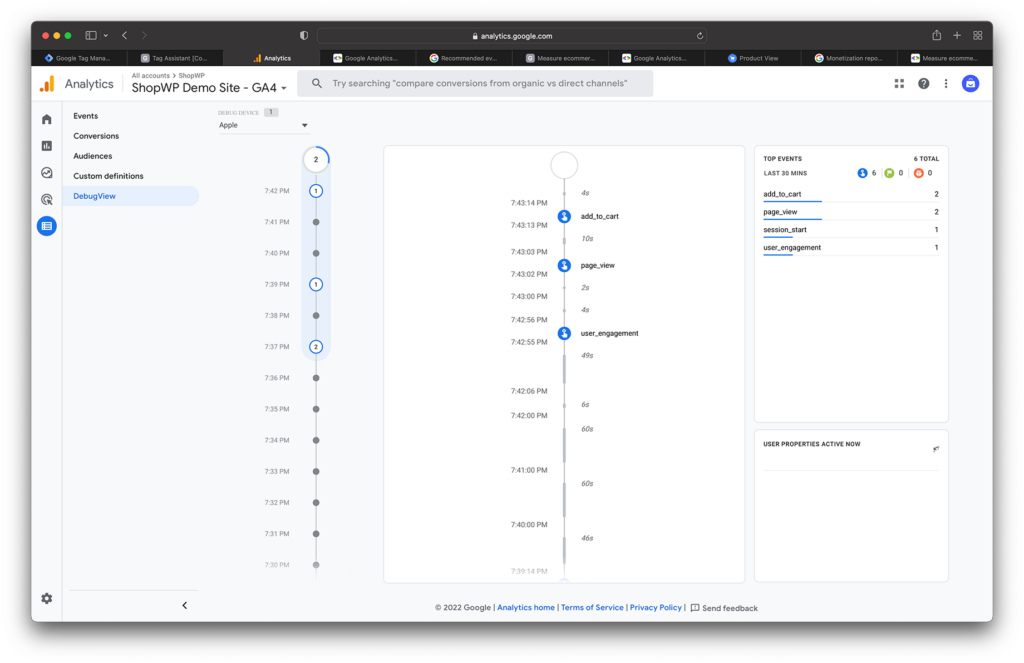
Ok, now let’s confirm that the event shows within Google Analytics as well. Open your GA4 dashboard and click the Configure sidenav link. From there, click DebugView.
You should see an event toward the top of the timeline called add_to_cart like this:
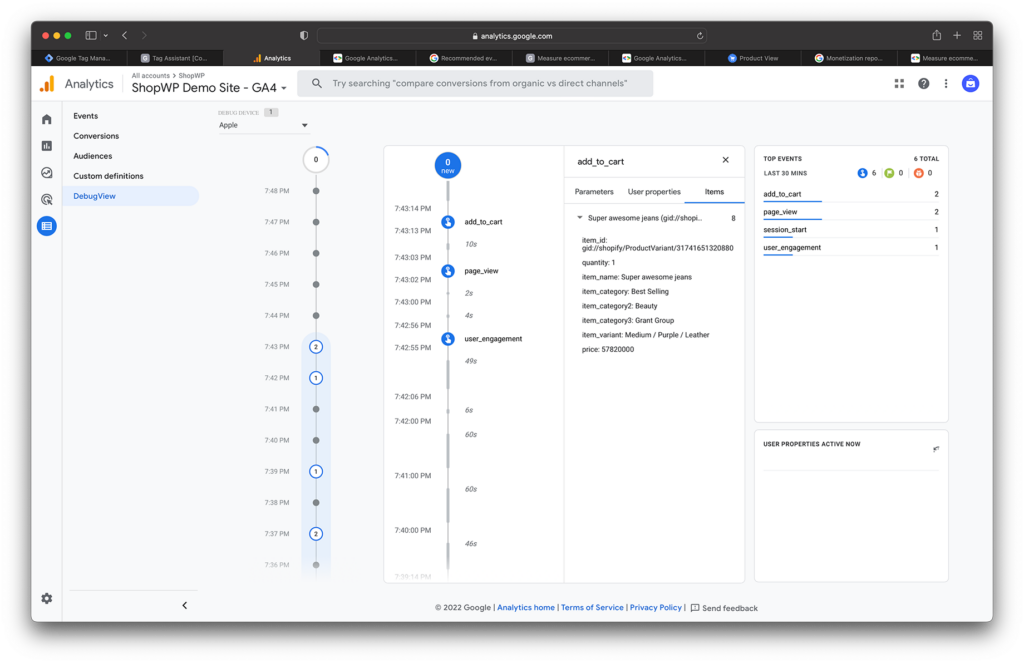
Clicking the add_to_cart event should show a new pane with a tab labeled Items.
Click Items to see all the product information passed from the JavaScript code we added earlier. We’re using the standard Google Analytics ecommerce tracking method, so everything should be integrated appropriately throughout GA4.
Congrats! You’re now tracking the ShopWP add to cart event within GA4.
As you can imagine, this is only the start of tracking all sorts of interesting information regarding the way your customers interact with your products.
For example, now that you’re tracking add to cart events, you can follow the same steps to track when a product is removed from the cart as well.
Start simple and tweak as needed. If you run into any problems, please reach out via email with any questions.
Good luck!