Using Elementor and ShopWP Pro together is a powerful combination to visually build custom layouts for your WordPress store. Not only does it give you more control over the visual layout, but it’s also very easy to learn if you’re already using Elementor for everything else.
In the below guide I’ll explain how to combine the two platforms. Everything from how to get started, creating custom product templates, and everything in-between.
Let’s go!
Requirements
There are three basic requirements for using Elementor with Shopify.
First, you’ll need Elementor installed—Elementor Pro is optional.
Second you’ll need two additional WordPress plugins installed: ShopWP Pro and the ShopWP Elementor extension.
Our ShopWP Elementor extension comes with seven custom widgets for displaying your Shopify products. Each widget contains useful settings for changing things like product title color, buy button styling, layout, etc.
Elementor Pro is optional and only needed if you want to customize product page templates.
Adding the products widget
Let’s add a simple product widget to an Elementor layout to see how it works.
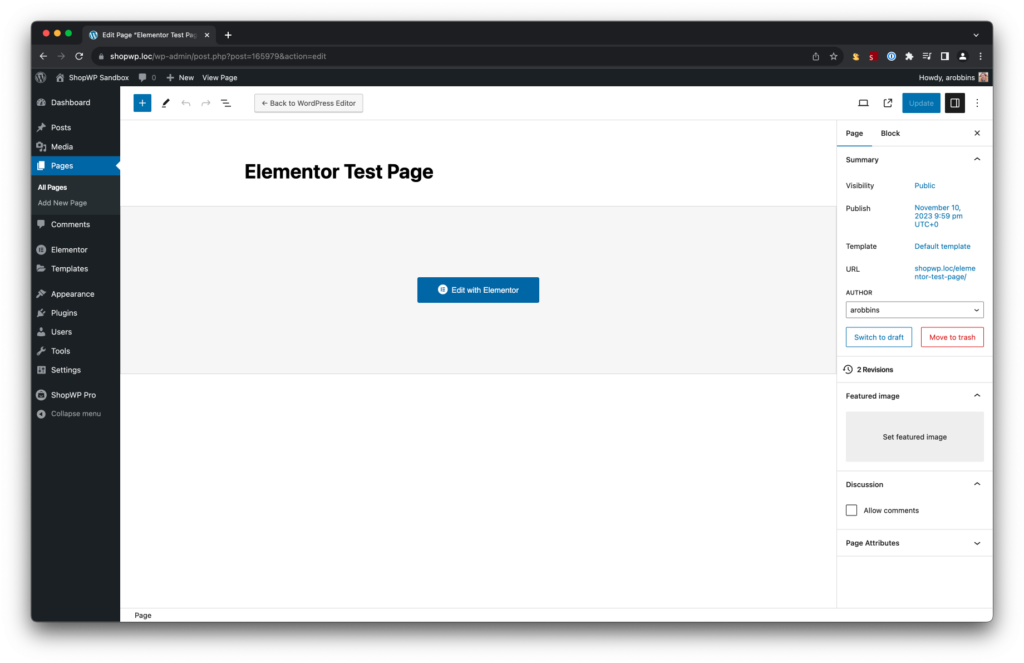
First, create a new WordPress page called Elementor Test Page and save. We’ll use this page to test the custom widgets.
After saving click the Edit with Elementor button to open the Elementor visual builder.
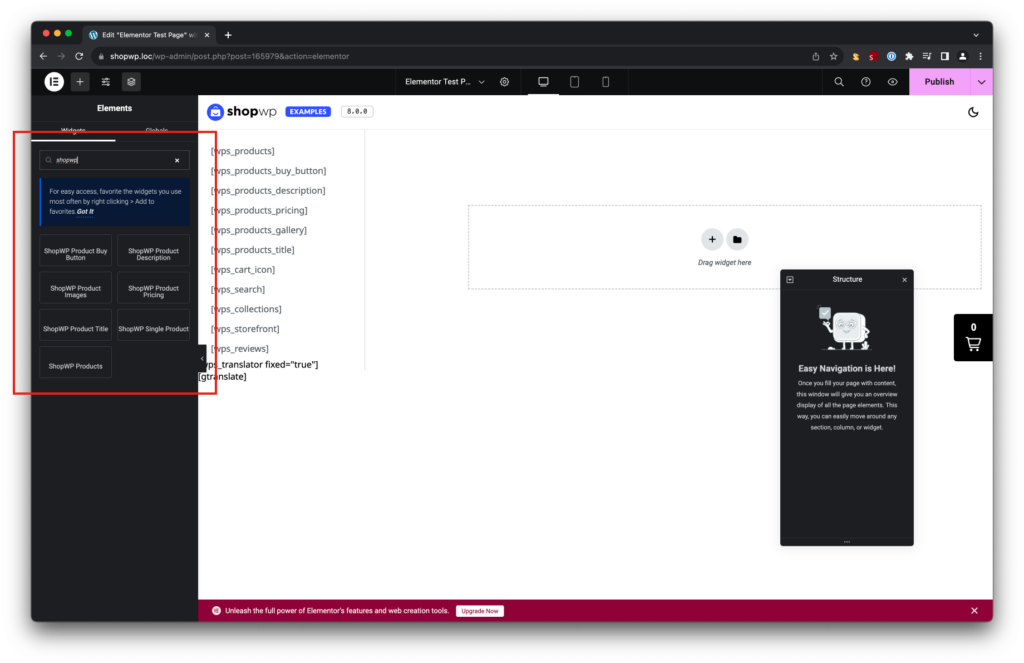
After Elementor opens, type “ShopWP” into the search field within the left-hand column to show list of the ShopWP custom widgets.
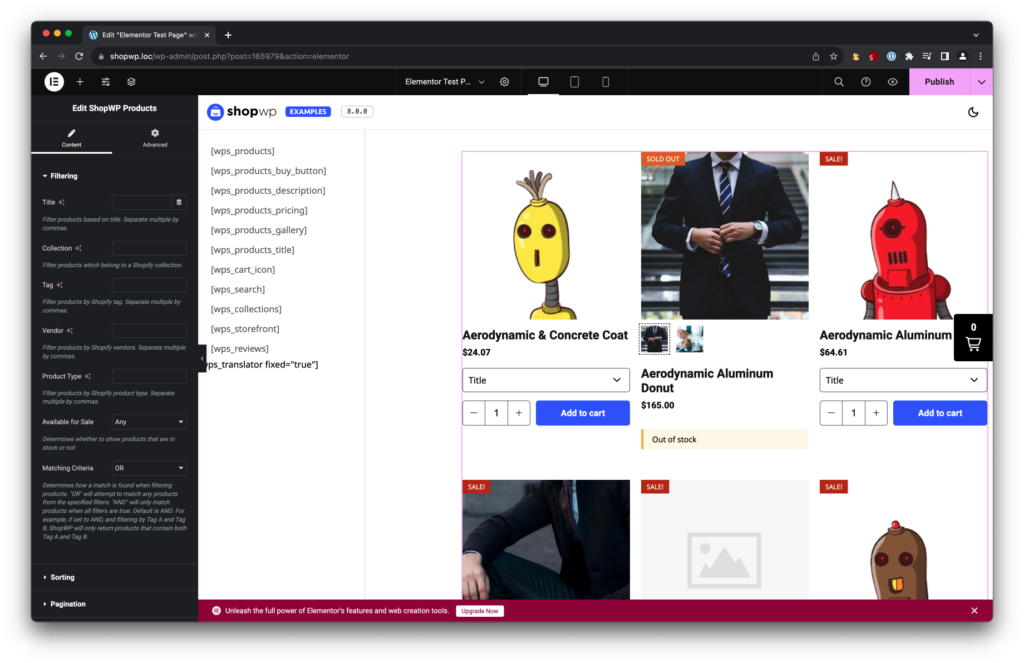
Click ShopWP Products to add it to your layout. After a brief moment you should see your products added directly to your page layout. Very cool!
Customizing widget controls
Now that we have the products widget added to our layout we can begin customizing it.
Right now, the products widget is showing the first 10 products from our shop. Let’s change that by filtering the products down to a specific collection instead.
I have a custom collection setup already but if you don’t, open Shopify and do that now. Make sure to assign a few products to the collection.
Click the products widget to see a list of widget controls on the left. From there, you should see a “Filtering” section. Within the Collection field type the name of your collection and watch your products change dynamically!
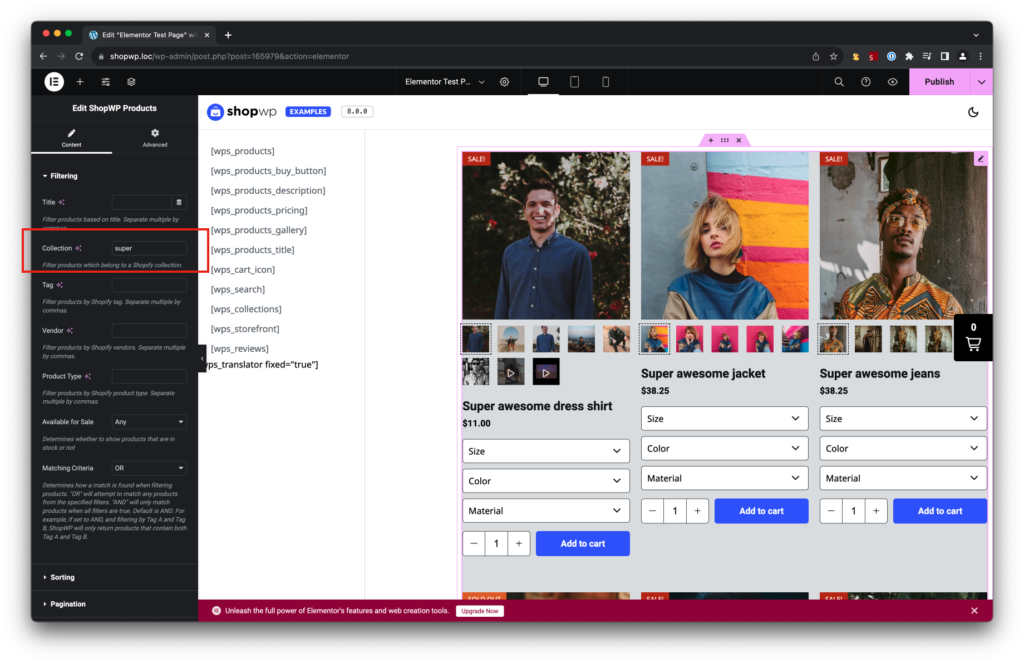
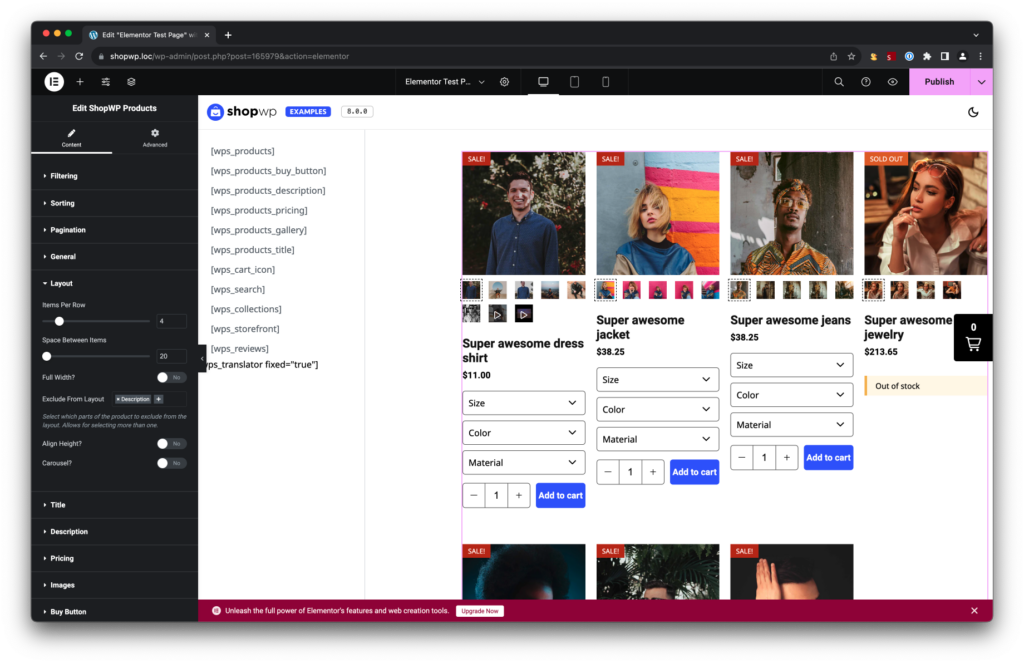
Now let’s change the number of products per row from three to four. To do this, open the “Layout” section find the “Items per row” control. Move the slider and watch the layout change.
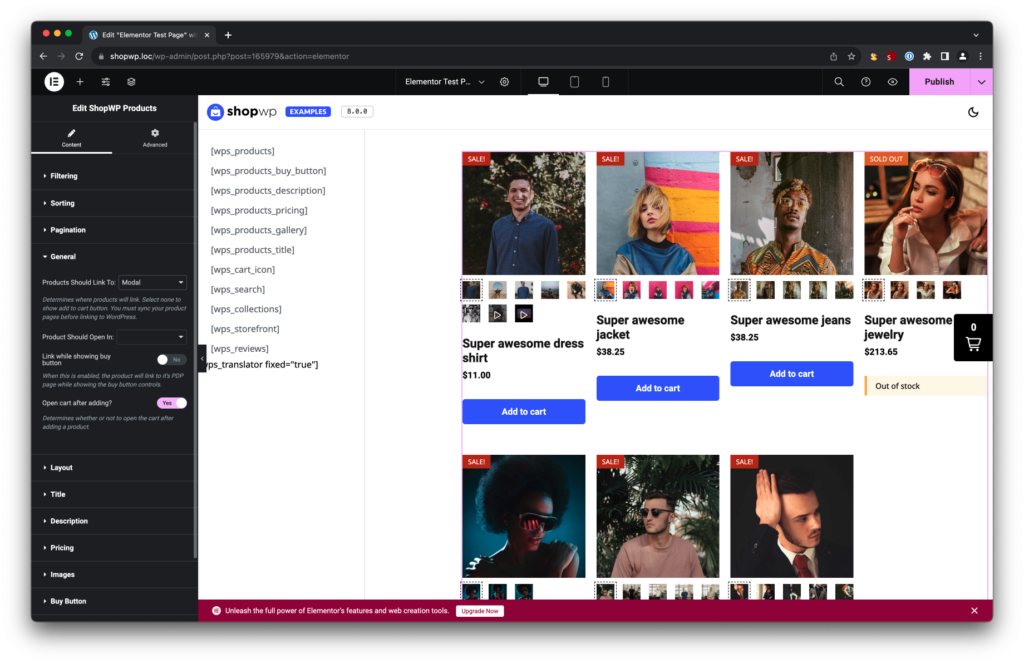
Instead of showing the buy button directly, let’s show a button that opens the product details in a modal instead.
Find the “General” section and change the “Products should link” to “Modal”. Also make sure “Link while showing buy button” is turned off.
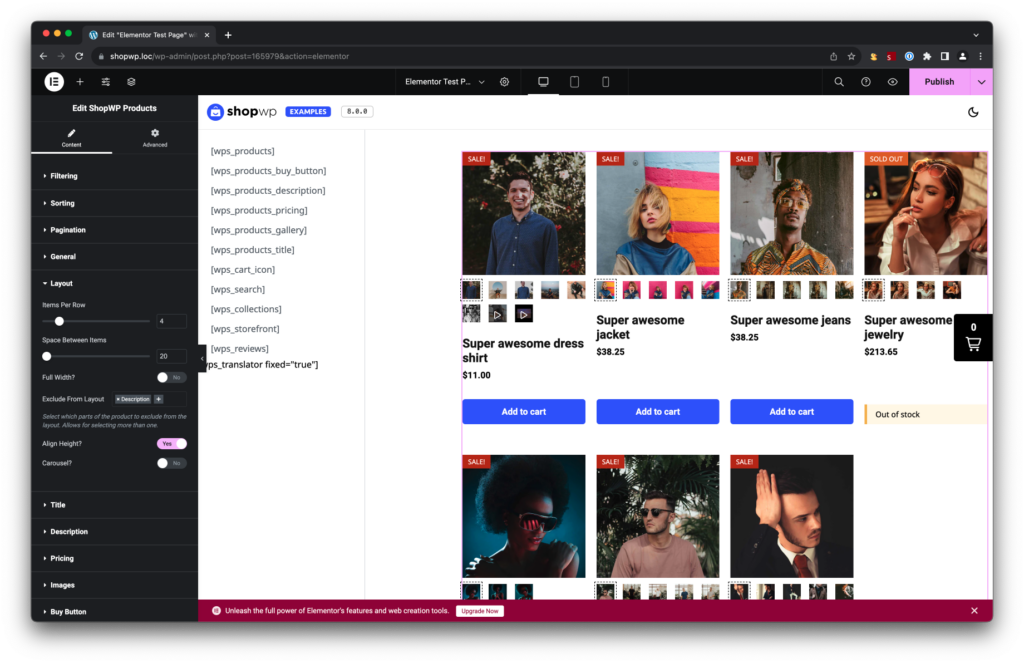
Looking better. But how can we align the buttons? To do this, open the Layout section and enable the “Align height” options.
There are two more things I want to do. I’d like to remove any out of stock products and change the text of the button to “View product” instead.
We can accomplish this by going back to the Filtering section and changing the “Available for sale” option to “In stock”.
Afterwards, open the “Buy button” section and change the add to cart text to “View product”.
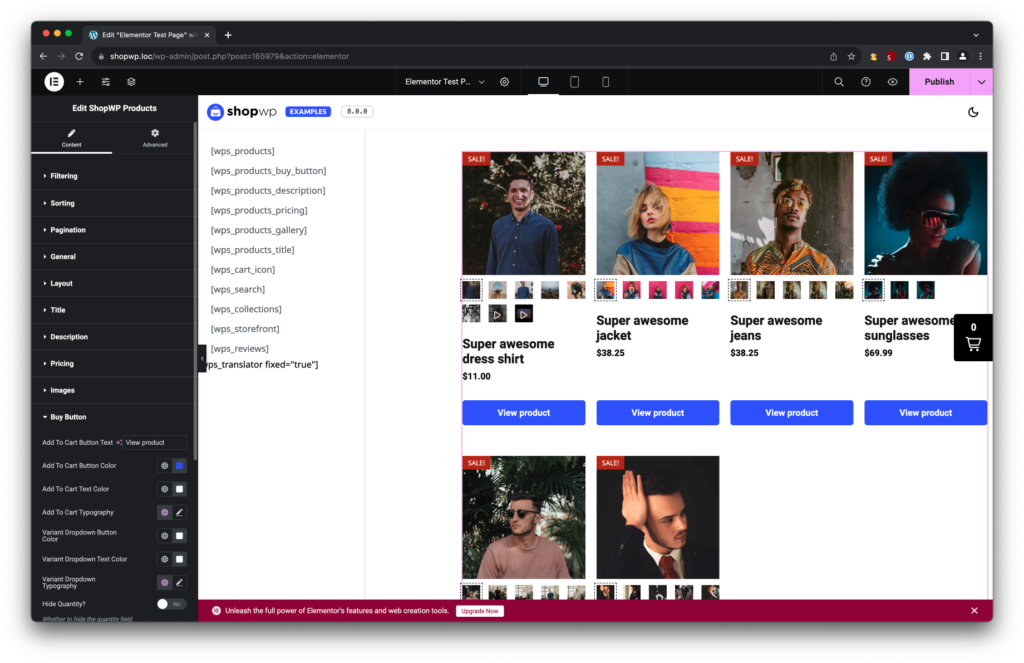
Awesome! That was pretty easy, huh?
Now let’s view our changes on the frontend.
Cick the “Publish” button in the top right corner to save the changes. Then click the “eye” icon next to the publish button to view the frontend.
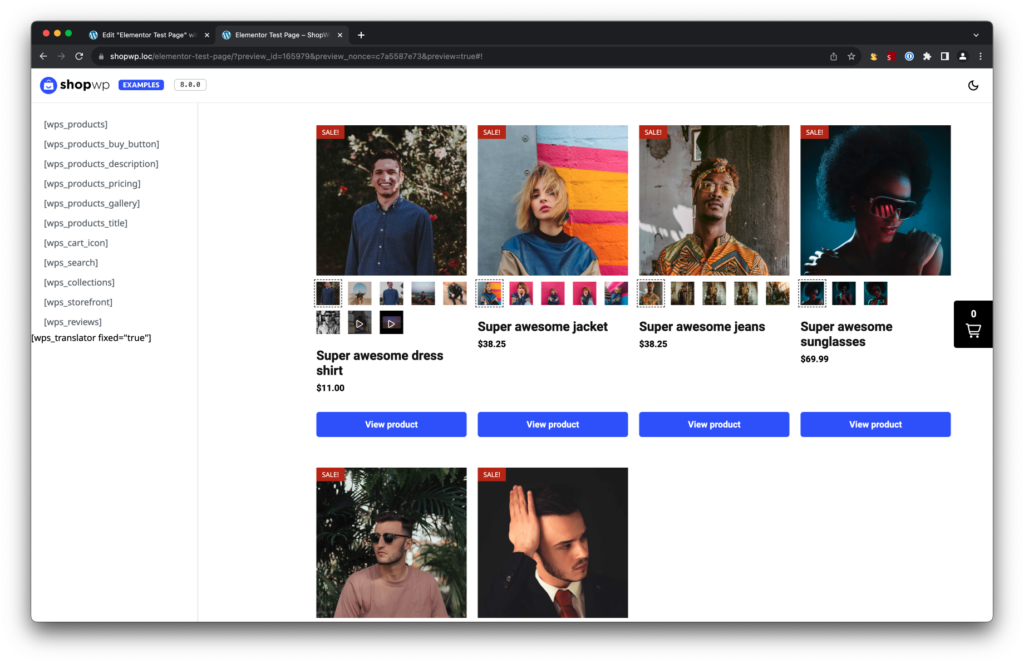
Custom product templates
One of the benefits of using Elementor Pro is that you gain access to the Elementor Theme Builder and template editing. You can use this feature to visually build templates for the ShopWP product detail pages. Let’s create one now.
1. Create a new template
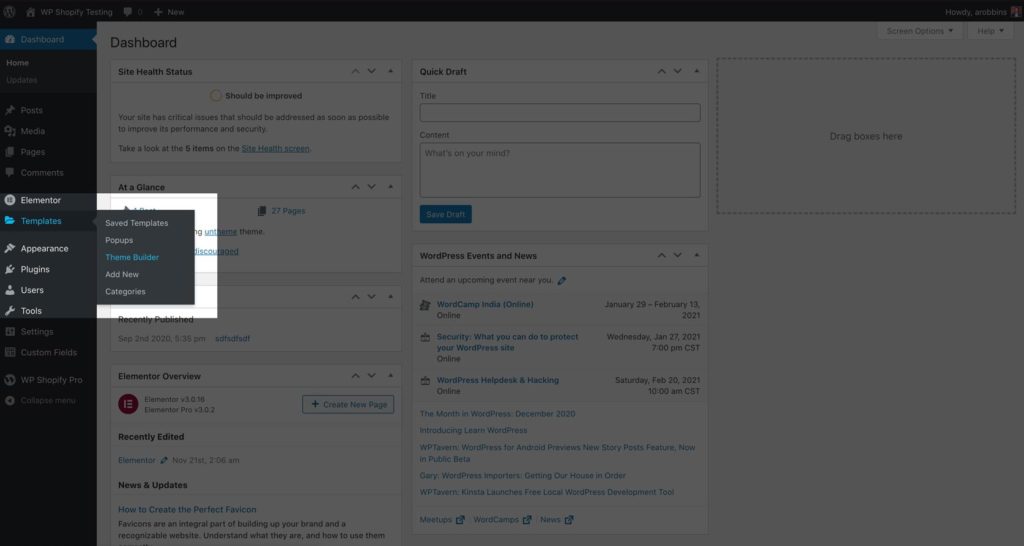
Let’s start by creating a custom template by going to Templates - Theme Builder
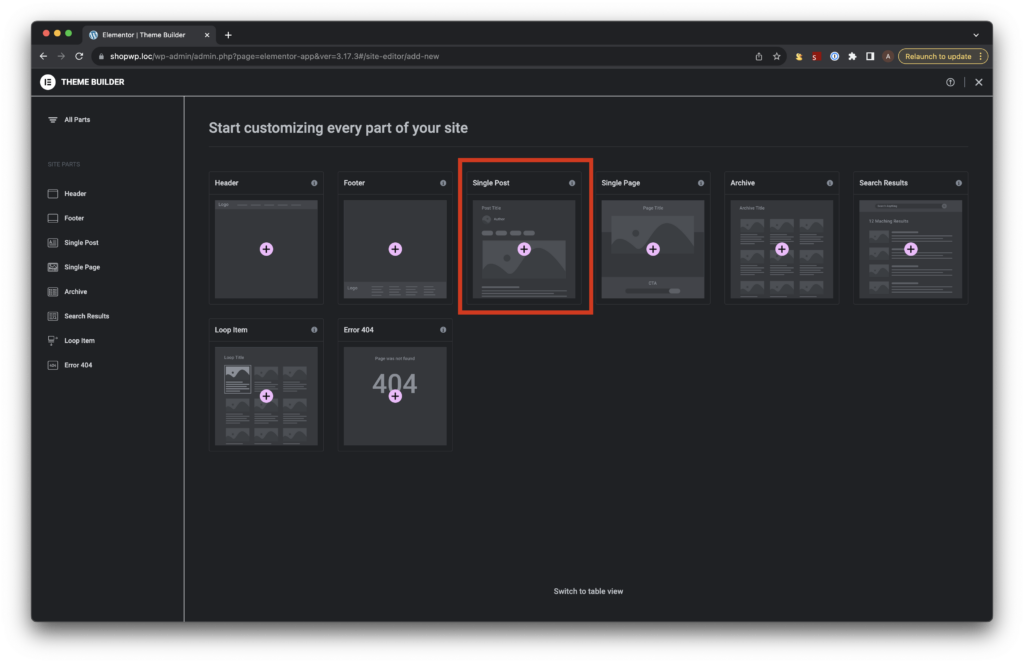
Since we want to create a template for the product detail pages, we’ll select “Single Post” for the template site. Later in this guide we’ll set the conditions of this template so that it only applies to ShopWP products.
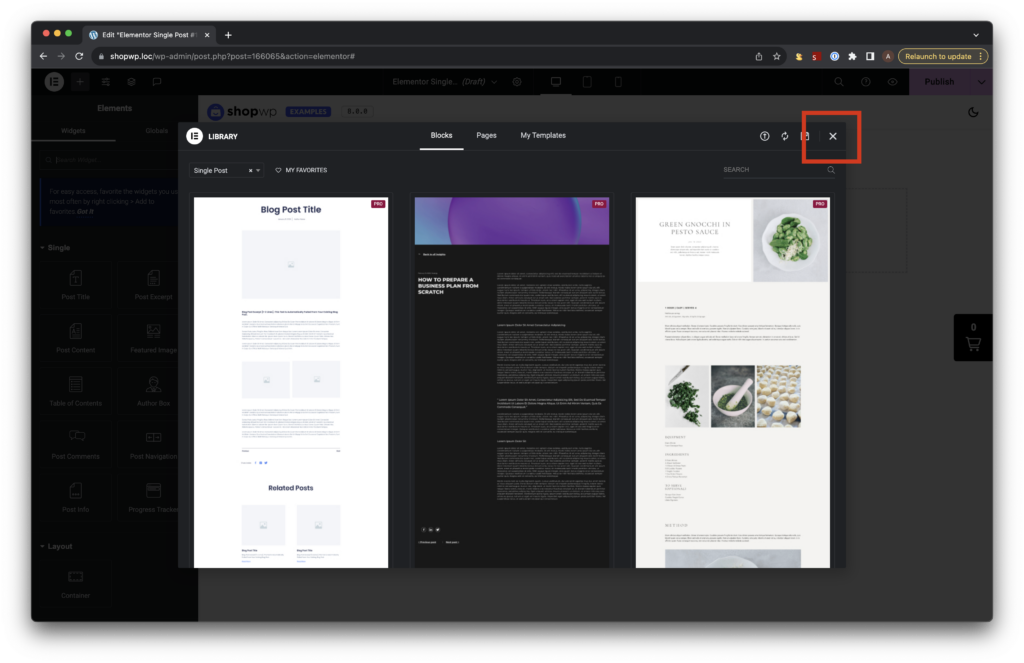
Once the Elementor Library loads you can choose your own pre-made layout or start from scratch. Both options will work. However, we want to start fresh so we can skip adding any existing template. Just exit out of this modal below.
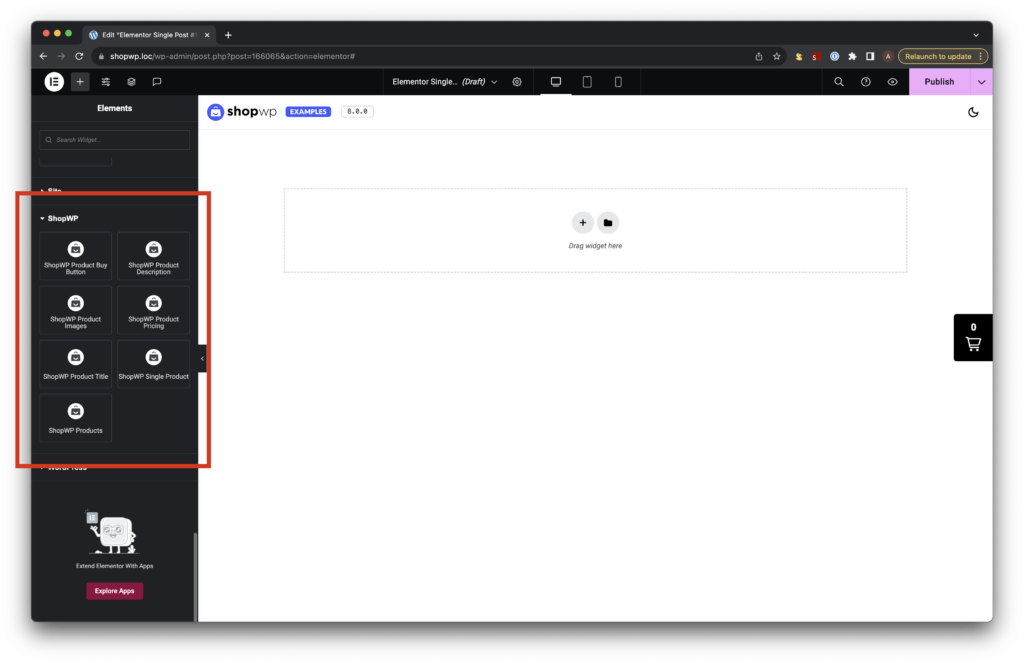
Once the template editor loads, scroll down to the bottom of the widget selection sidebar and you’ll see the list of ShopWP Elementor widgets. We’ll use these to build our product detail page template.
Since we’re creating a Single Post template, the product info will be dynamic depending on which product you’re previewing.
2. Start designing your layout
For the purpose of this guide we’ll create a simple two column layout for our product detail template.
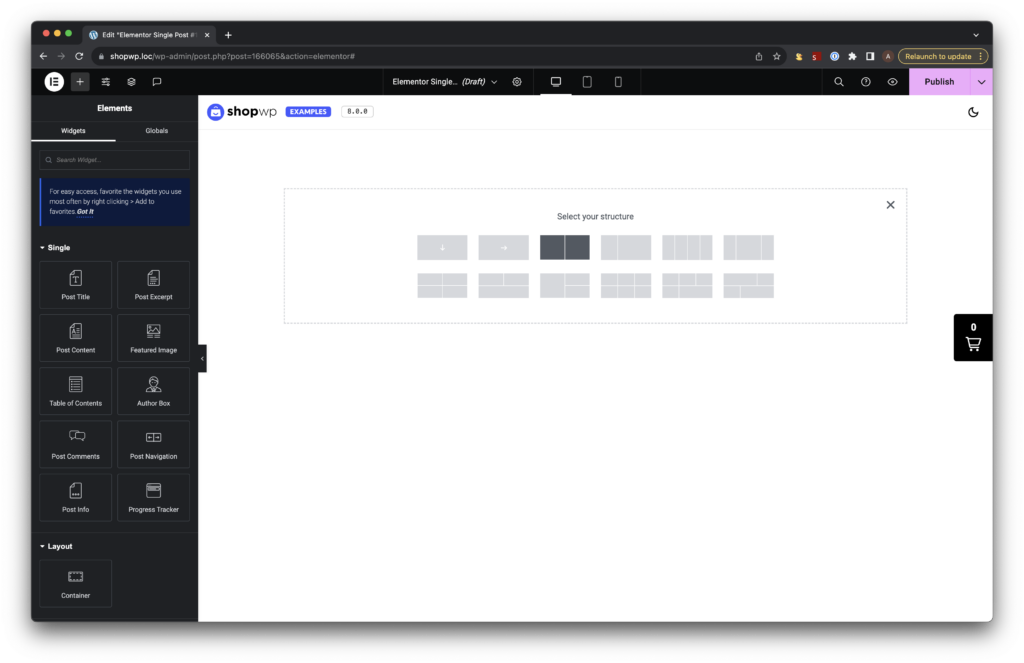
First, we’ll add the Elementor “two column” widget to create the structure we need. This will allow us to add our widgets to the left and right columns.
Next, add the ShopWP Product Images widget to the left column:
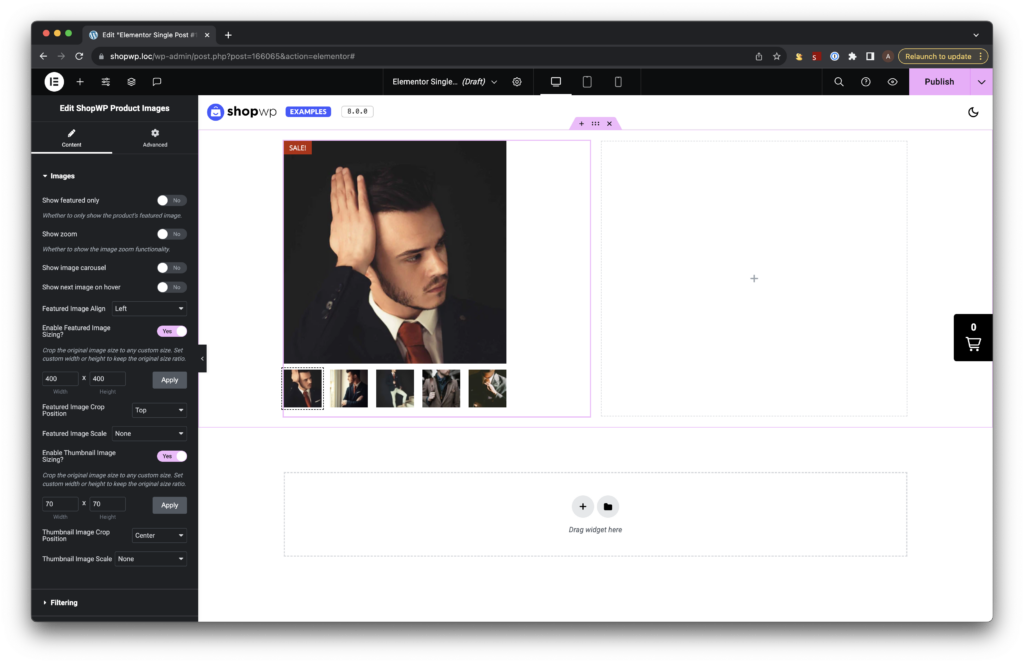
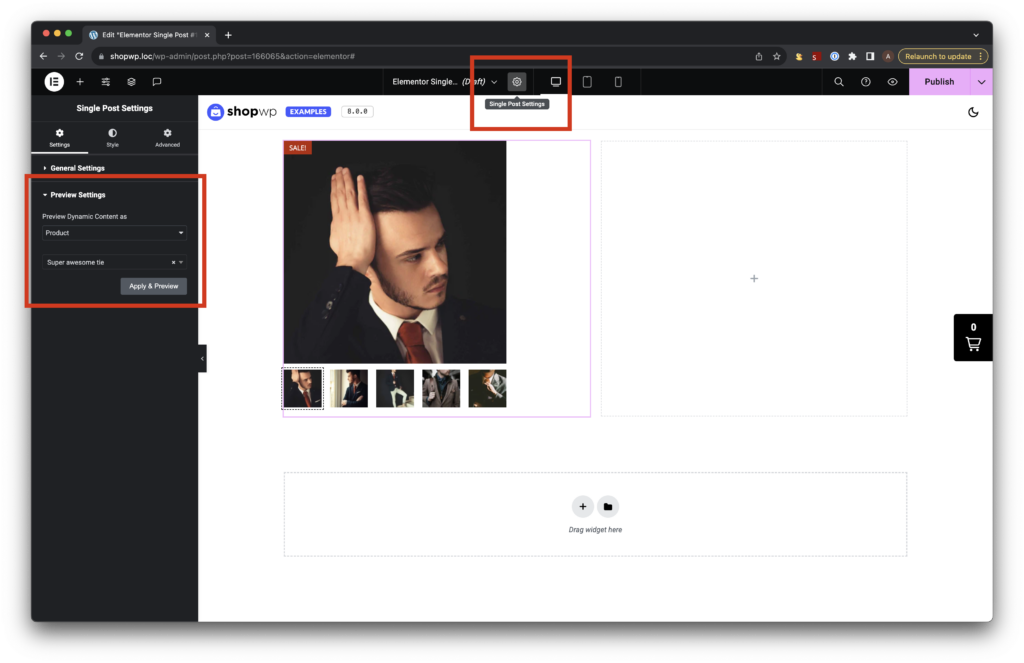
Remember, you can change which product is shown by adjusting the “Preview” settings. Simply click the “Single Post Settings” gear icon and then find the Preview settings in the left hand column.
You can then set the “Preview Dynamic Content as” to Product. From there, you should see a list of your products to select. You can select any product from this list and watch the data dynamically change inside your Elementor layout. This will help you a lot during your design process.
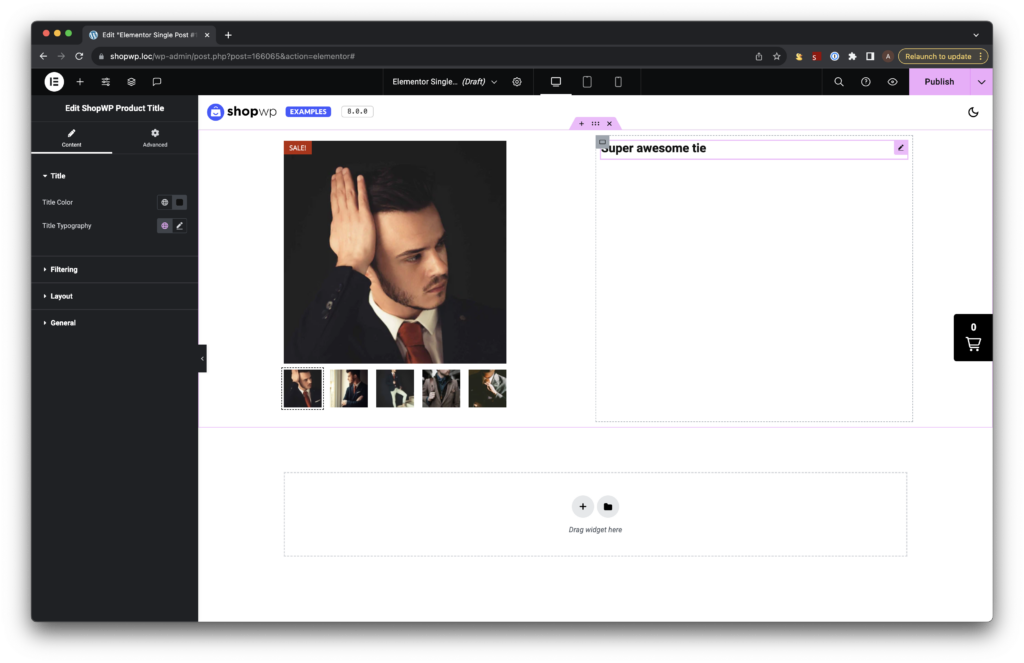
Next, let’s and the Product Title widget to the right column:
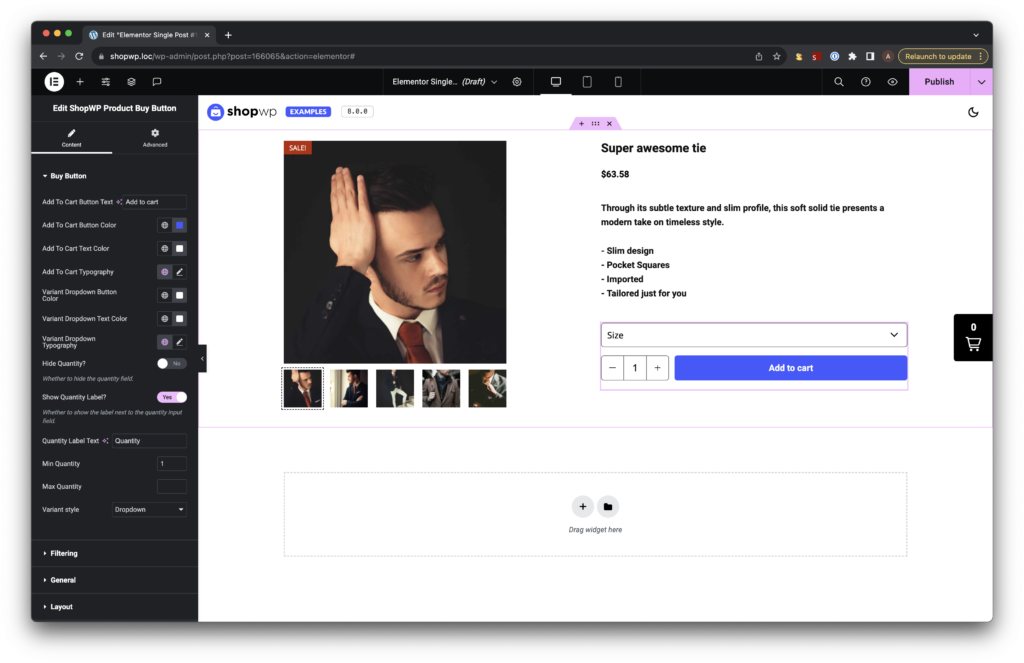
Finally, let’s add the rest of our layout components including the Product Price, Product Description, and Product Buy Button. All of these components can be found in the same place as the other two.
Display Conditions
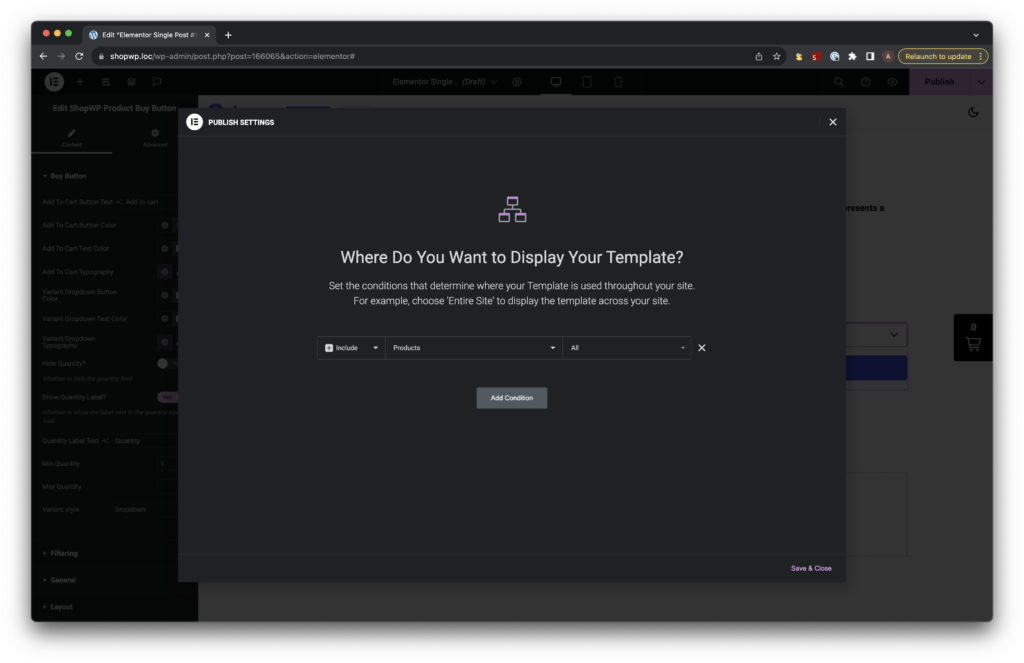
Before you can use your template you’ll need to configure the “display conditions”. This basically tells Elementor where and how to use the template.
If you’re saving your template for the first time you can just click Publish in the top right corner. This will automatically bring up the display conditions modal window.
Click “Display Conditions”.
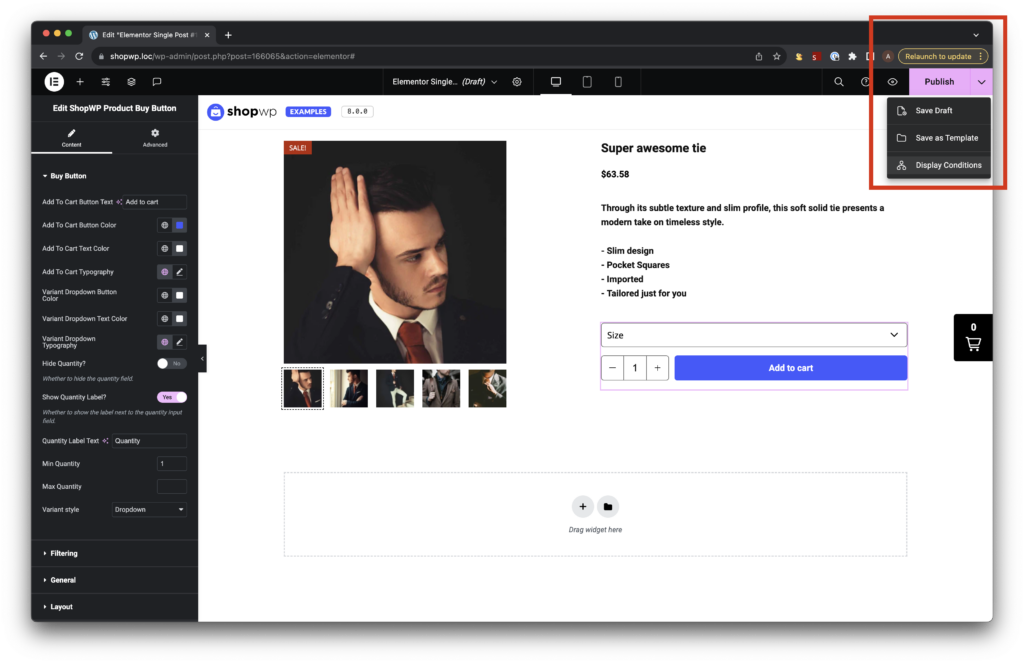
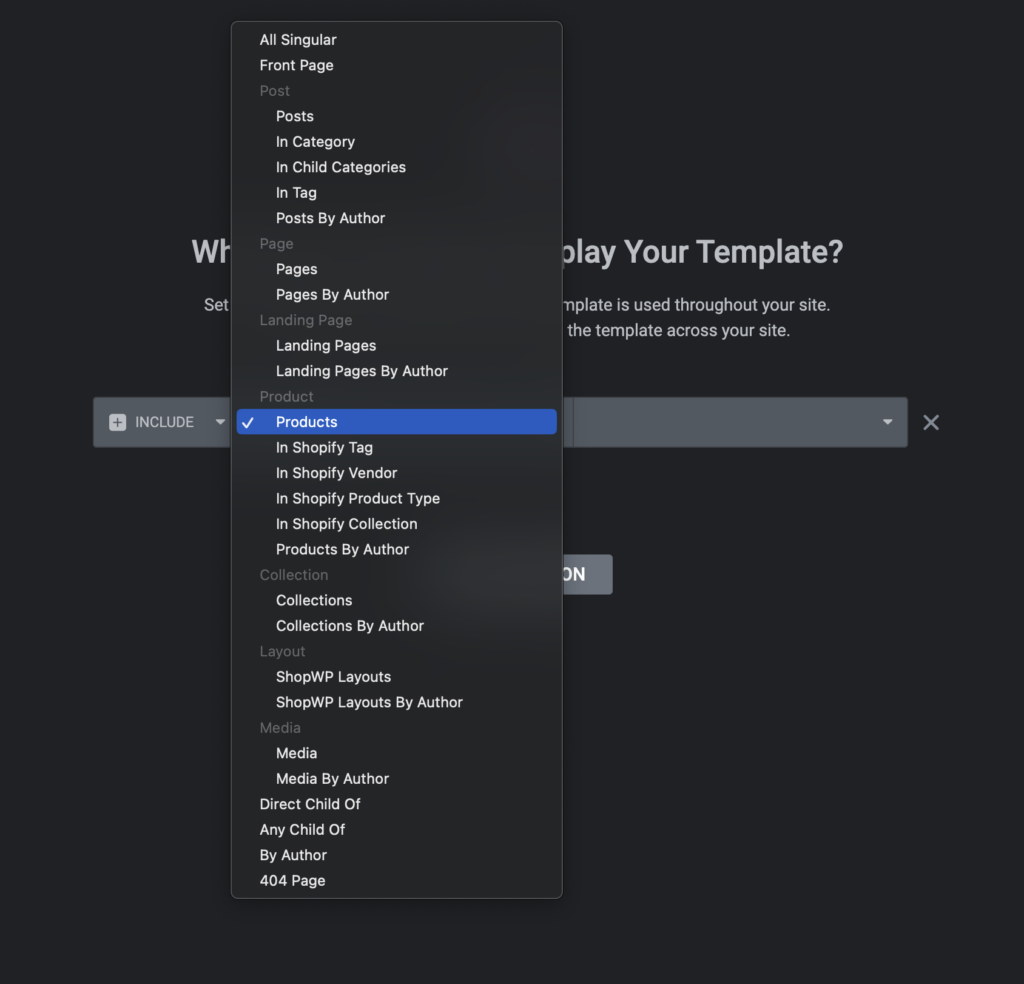
You can then add the condition you want. For our purposes we’ll want to set the template to display for product singular pages only. See below screenshot.
You can also create different Elementor templates and assign them to different products depending on various conditions.
For example, you can create a template that only applies to products with X tag. OR, a template for products assigned to Y vendor AND Z tag.
This essentially allows you to combine display conditions to make more complex layouts.
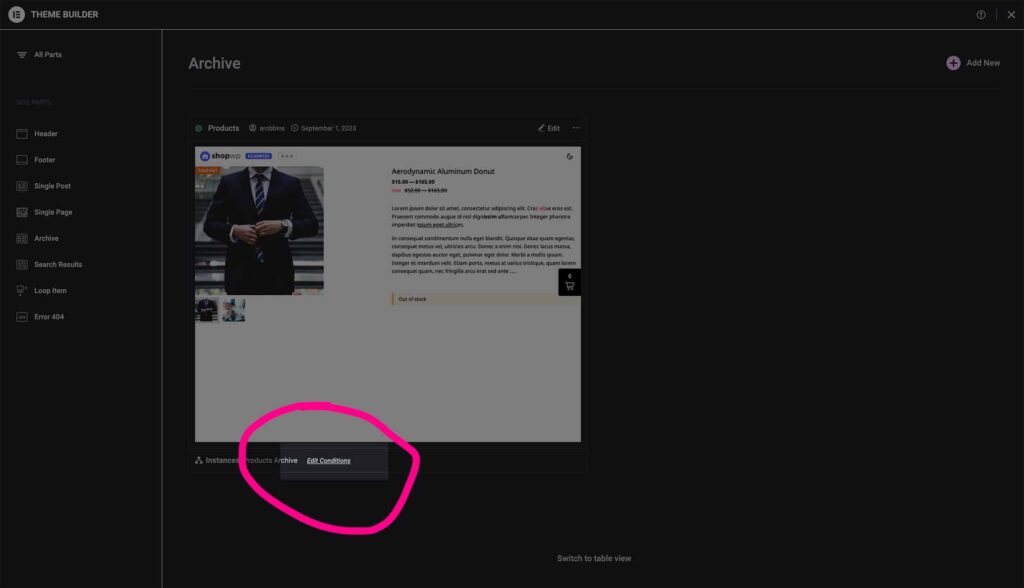
Another way to access the template display conditions is by clicking the Elementor logo in the top left corner and choosing Theme Builder. This will bring you back to the main template listing page.
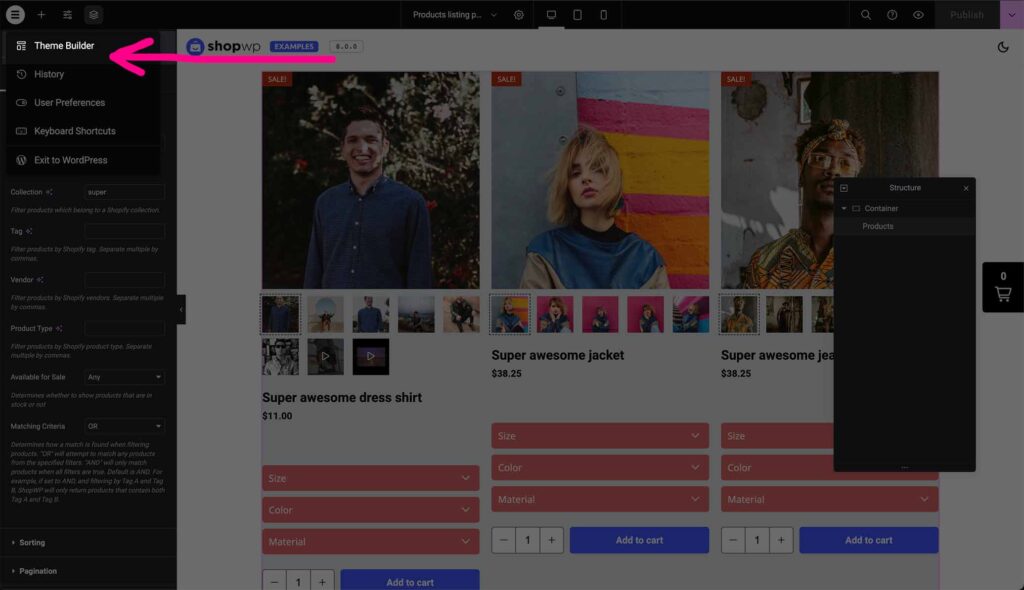
Then click the template you were working on. You should see a small link toward the bottom labled “Edit conditions”.
