ShopWP comes with two default pages out of the box:
The Product Listing Page (PLP)
The Product Detail Page (PDP)
These two pages are not technically “pages”, but rather templates that you can customize.
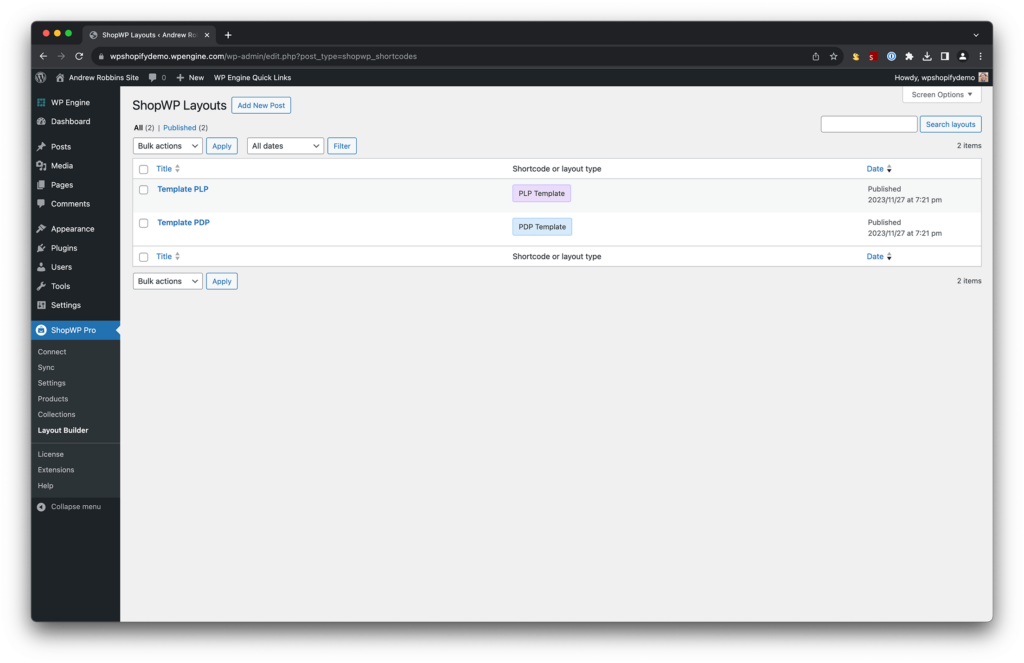
The ShopWP Layout Builder is responsible for creating the two default product templates
These templates are created when the plugin is first installed. The design can be edited using the ShopWP Layout Builder tool by going to WordPress Dashboard - ShopWP Pro - Layout Builder.
You can create templates for the following pages:
Product Listing Page ( PLP)
Product Detail Page (PDP)
Collection Listing Page (CLP)
Collection Detail Page (CDP)
How the URLs work
ShopWP uses the native WordPress permalink settings to control the URLs for both your Product and Collection pages.
The URL you choose here will be used for both your PLP and PDP pages.
For example, if your site is https://example.com and your ShopWP Products URL is set to products, your product detail page URL will look like this:
The slug here is super-awesome-product and will match the slug you have set for your product inside Shopify. This is pulled over during a ShopWP sync.
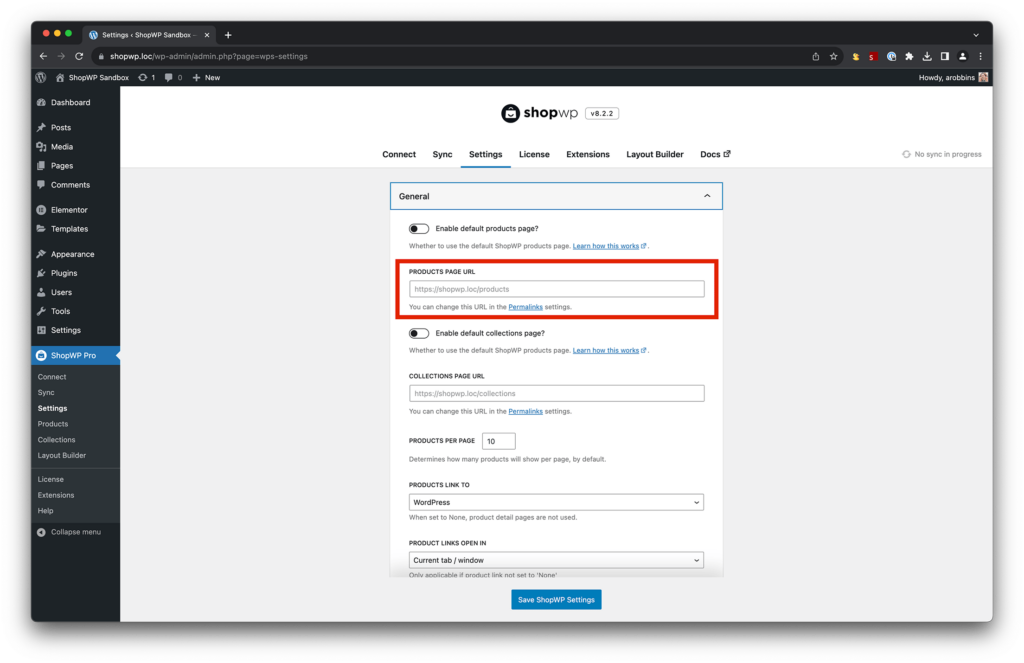
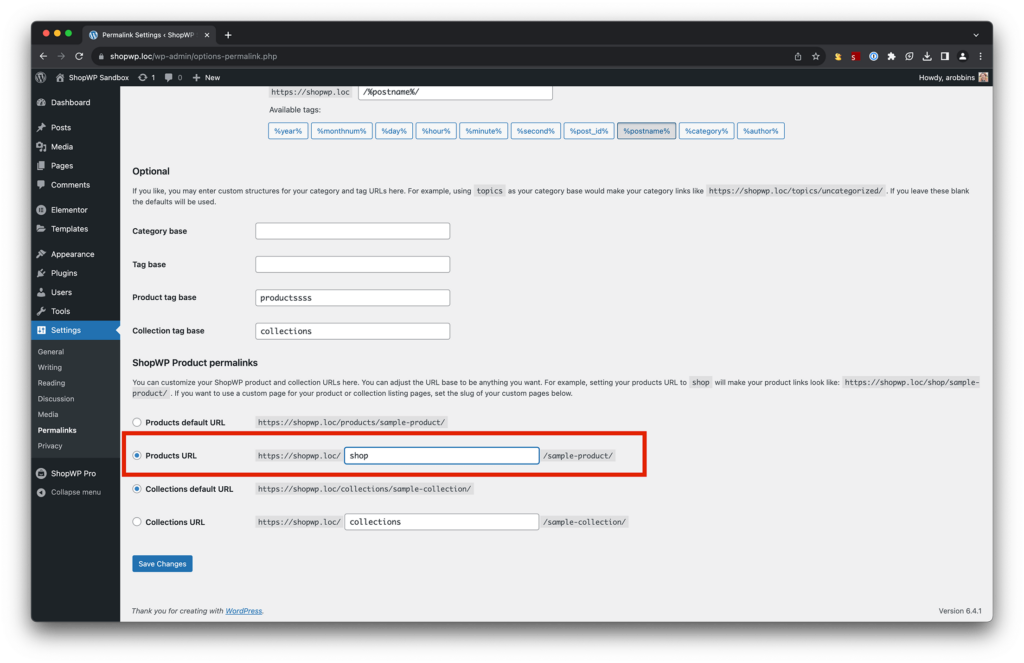
Changing default page URLs
If you open the ShopWP General settings you’ll notice two URLs listed for your products and collections. These URLs are automatically set for you when the plugin is first installed.
By default, the products URL is set to /products and collections URL is set to /collections.
Your products and collections will show up here by default. To edit these URLs, you’ll need to open your WordPress Permalink settings.
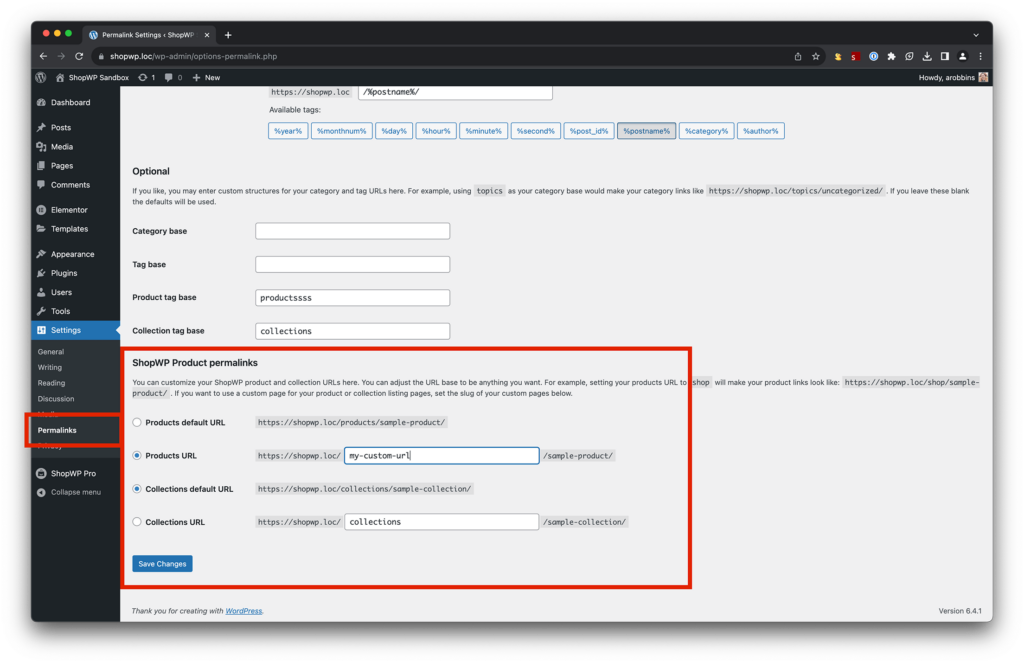
The native WordPress Permalink settings
You can set this to anything you want!
You don’t need a corresponding WordPress page to match the slug you choose.
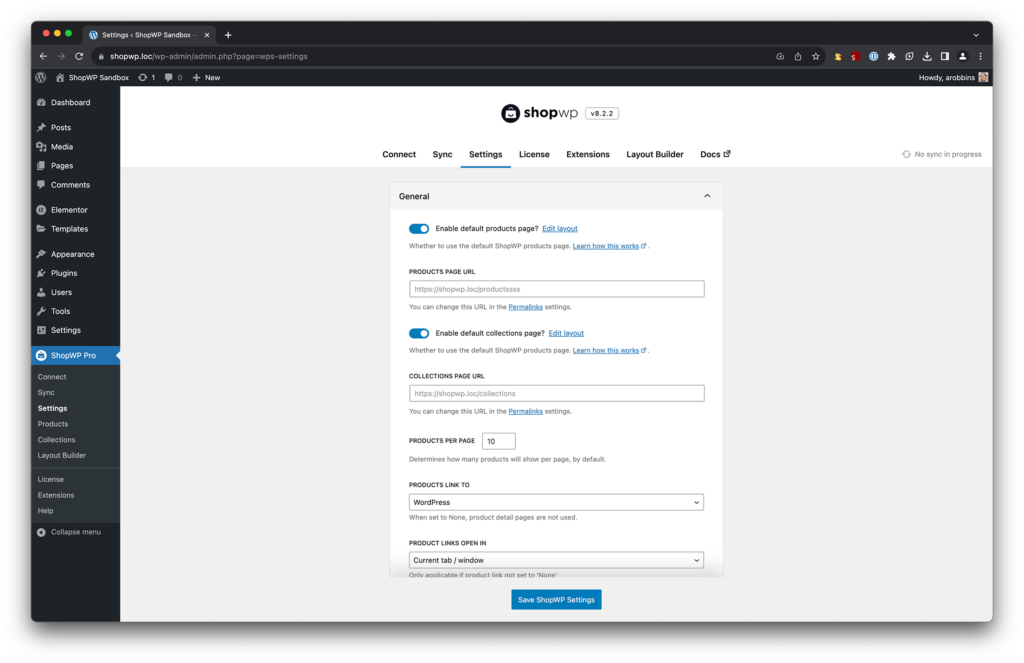
Turning off default pages
If you don’t wish to use the default ShopWP pages you can turn them off in the plugin settings here: WordPress Dashboard - ShopWP Pro - Settings - General
Simply uncheck the “Enable default products page” and “Enable default collections page” settings.
For example, if you created a custom page called Shop with a slug of shop, then you’ll need to change the ShopWP products URL also to shop.
See below:
The product URLs can be changed in the native WordPress Permalink settings
How detail pages work
ShopWP will create product and collection detail pages automatically for you during a sync. This is the main feature of the ShopWP syncing process.
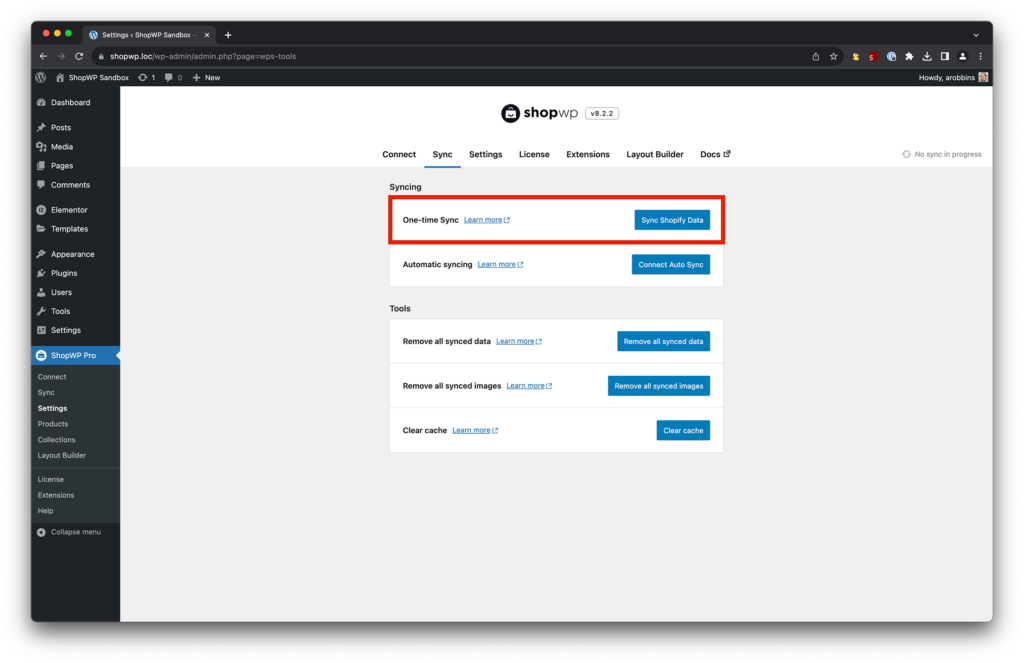
Running a sync
1. First, open the “Sync” tab and use the One-time Sync button. This will attempt to sync all of your products.
This is where you can run a one-time sync to create product detail pages
If you don’t wish to sync all of your products you can adjust the syncing settings first. For example, only sync products from a specific collection or with a specific tag.
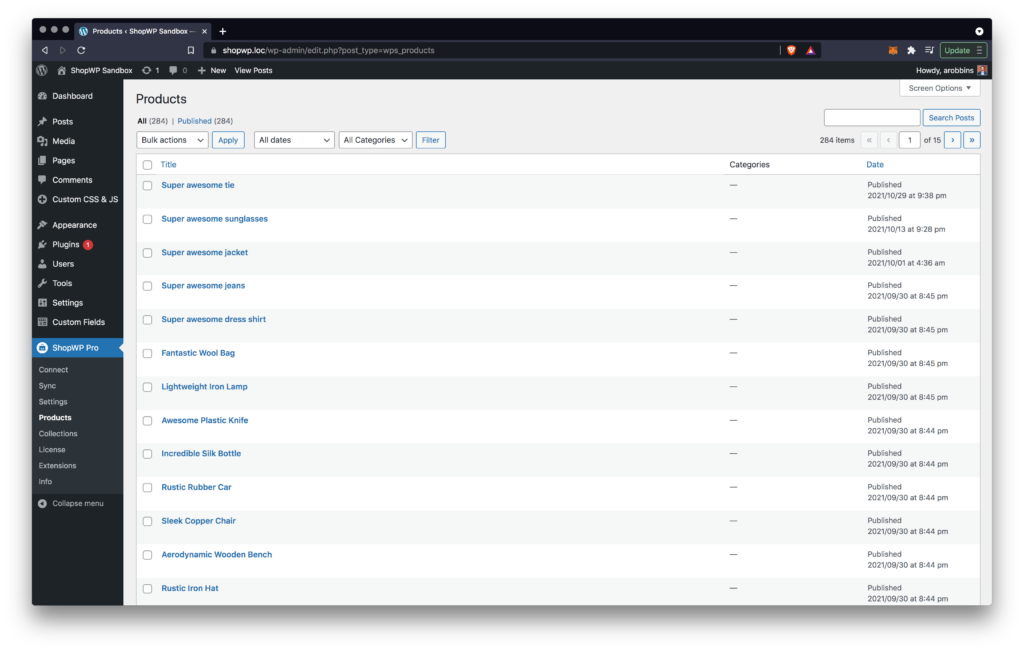
2. Once the sync is finished you will see a list of products within WordPress under ShopWP - Products.
After running a sync, your products will be listed in WordPress here
Conclusion
That’s all there is to it! Creating pages in WordPress for your Shopify products using ShopWP is pretty easy and straight forward.
You can decide whether or not to use the built-in pages and also customize the page URLs. We’ve tried our best to make it as seamless as possible.
With the Layout Builder tool, you can also customize the design of these pages which really gives you full control over how your store will look—without messing with PHP code.
The Complete Guide to Using Elementor with ShopWP Pro
By: Andrew Robbins(Creator of ShopWP)
Updated on: November 21, 2023
Using Elementor and ShopWP Pro together is a powerful combination to visually build custom layouts for your WordPress store. Not only does it give you more control over the visual layout, but it’s also very easy to learn if you’re already using Elementor for everything else.
In the below guide I’ll explain how to combine the two platforms. Everything from how to get started, creating custom product templates, and everything in-between.
There are three basic requirements for using Elementor with Shopify.
First, you’ll need Elementor installed—Elementor Pro is optional.
Second you’ll need two additional WordPress plugins installed: ShopWP Pro and the ShopWP Elementor extension.
Our ShopWP Elementor extension comes with seven custom widgets for displaying your Shopify products. Each widget contains useful settings for changing things like product title color, buy button styling, layout, etc.
Elementor Pro is optional and only needed if you want to customize product page templates.
Adding the products widget
Let’s add a simple product widget to an Elementor layout to see how it works.
First, create a new WordPress page called Elementor Test Page and save. We’ll use this page to test the custom widgets.
After saving click the Edit with Elementor button to open the Elementor visual builder.
The WordPress edit screen of our newly created “Elementor test” page.
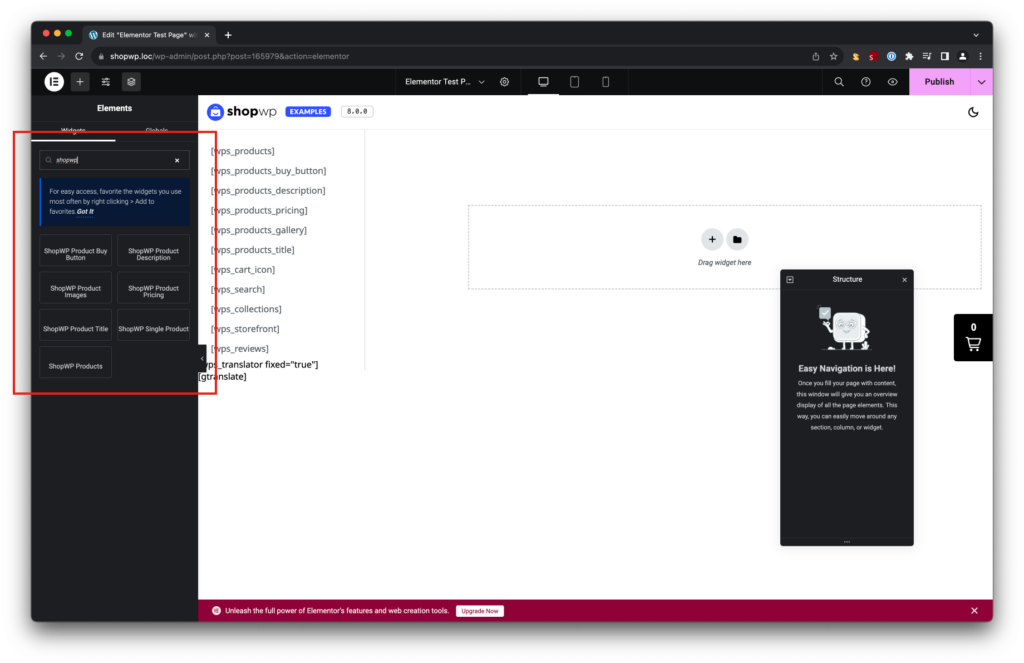
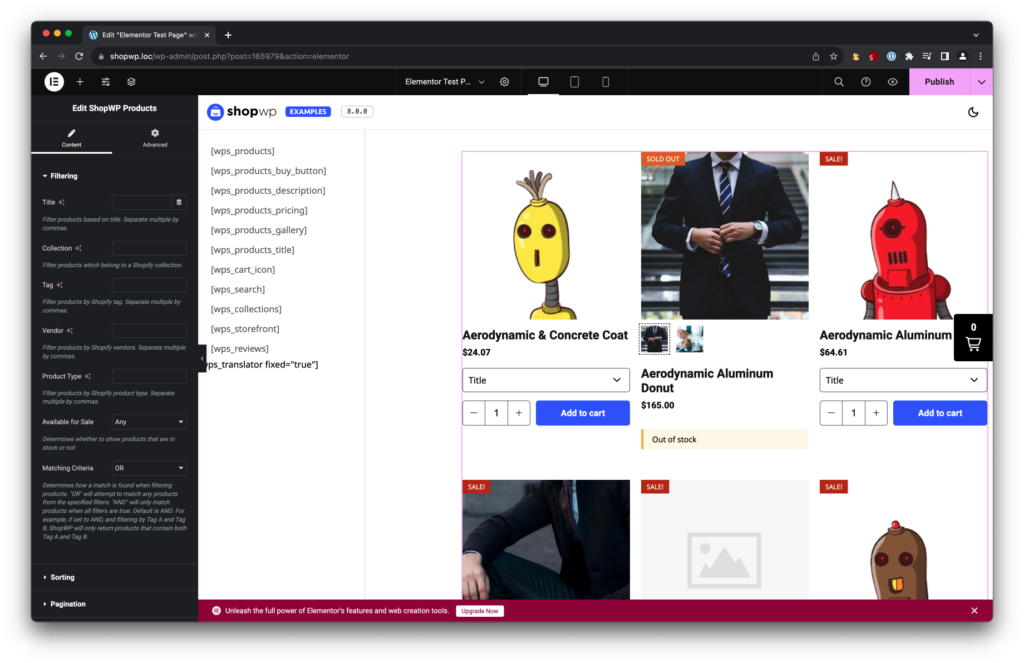
After Elementor opens, type “ShopWP” into the search field within the left-hand column to show list of the ShopWP custom widgets.
ShopWP comes with different widgets to show various components of your Shopify products.
Click ShopWP Products to add it to your layout. After a brief moment you should see your products added directly to your page layout. Very cool!
Note: your products will look different since you’re connected to a different Shopify store and using a different WordPress theme.
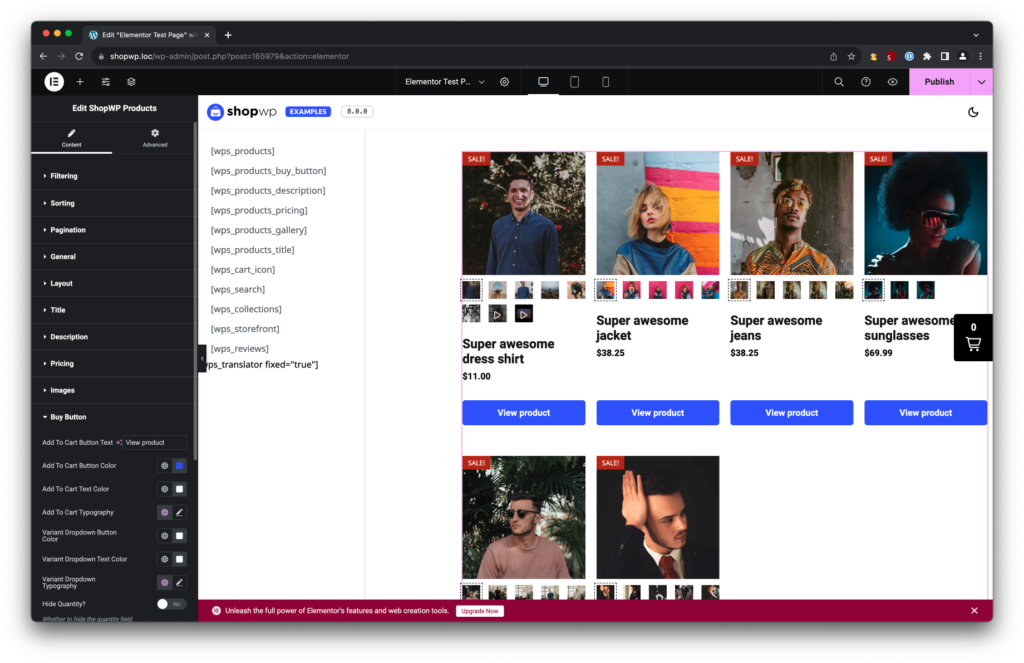
Customizing widget controls
Now that we have the products widget added to our layout we can begin customizing it.
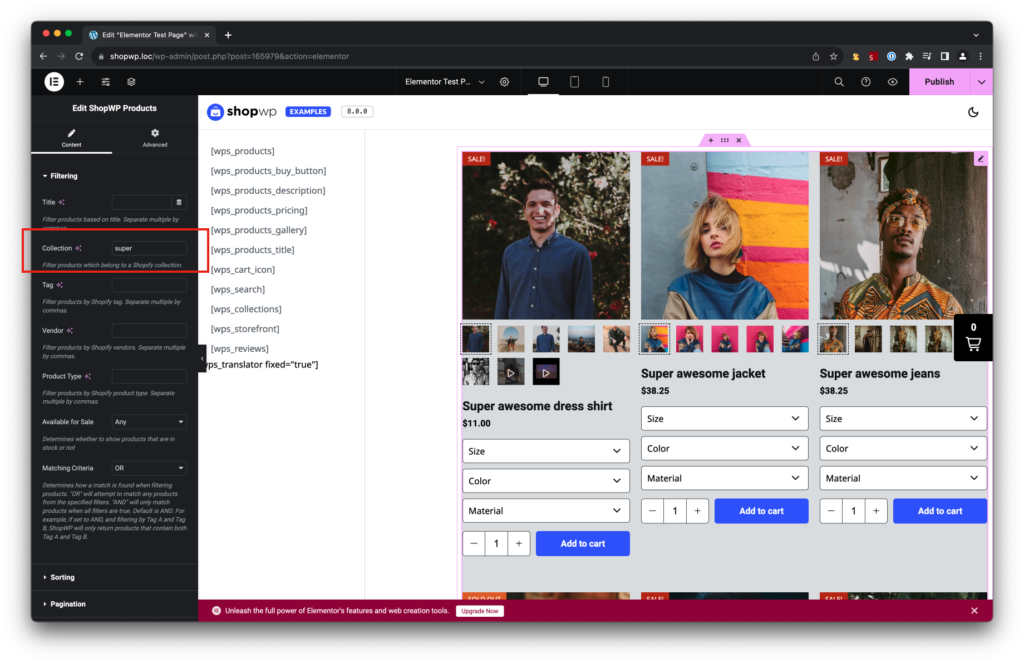
Right now, the products widget is showing the first 10 products from our shop. Let’s change that by filtering the products down to a specific collection instead.
I have a custom collection setup already but if you don’t, open Shopify and do that now. Make sure to assign a few products to the collection.
Click the products widget to see a list of widget controls on the left. From there, you should see a “Filtering” section. Within the Collection field type the name of your collection and watch your products change dynamically!
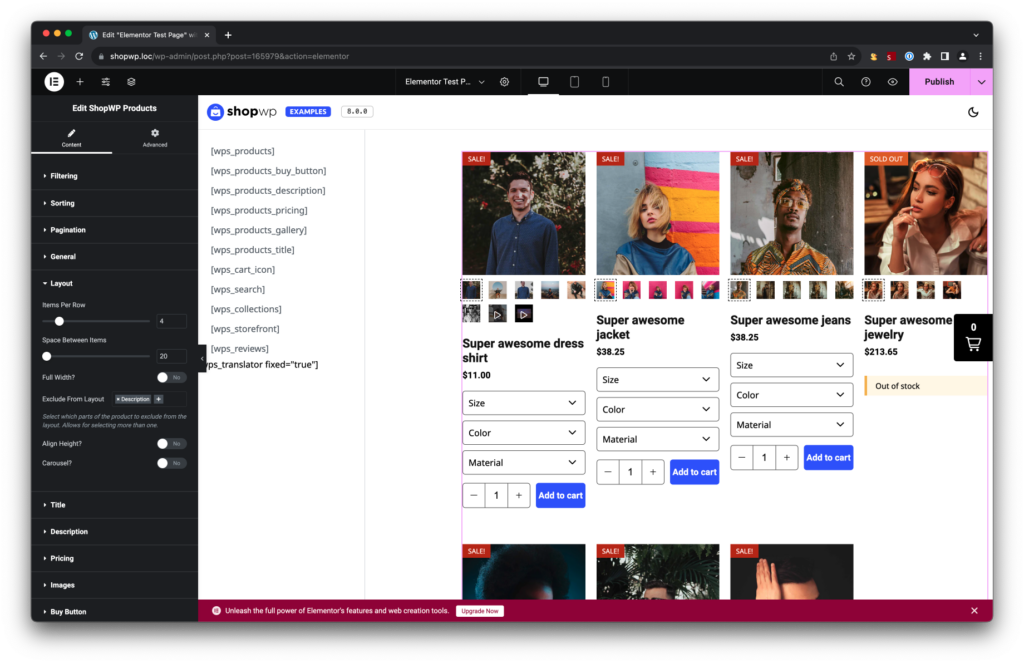
Now let’s change the number of products per row from three to four. To do this, open the “Layout” section find the “Items per row” control. Move the slider and watch the layout change.
Instead of showing the buy button directly, let’s show a button that opens the product details in a modal instead.
Find the “General” section and change the “Products should link” to “Modal”. Also make sure “Link while showing buy button” is turned off.
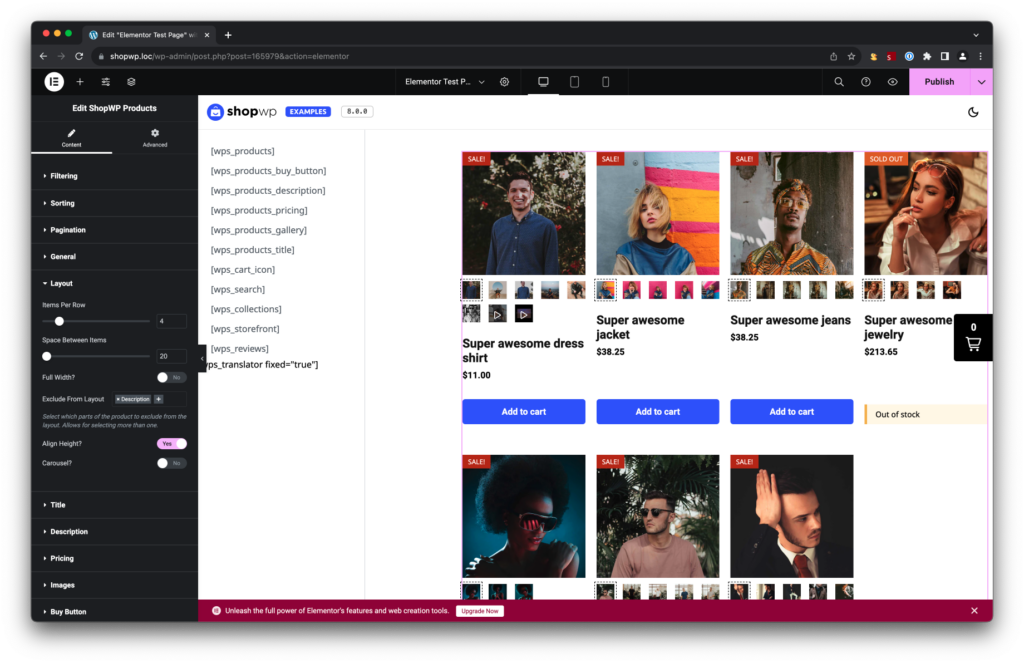
Looking better. But how can we align the buttons? To do this, open the Layout section and enable the “Align height” options.
There are two more things I want to do. I’d like to remove any out of stock products and change the text of the button to “View product” instead.
We can accomplish this by going back to the Filtering section and changing the “Available for sale” option to “In stock”.
Afterwards, open the “Buy button” section and change the add to cart text to “View product”.
Awesome! That was pretty easy, huh?
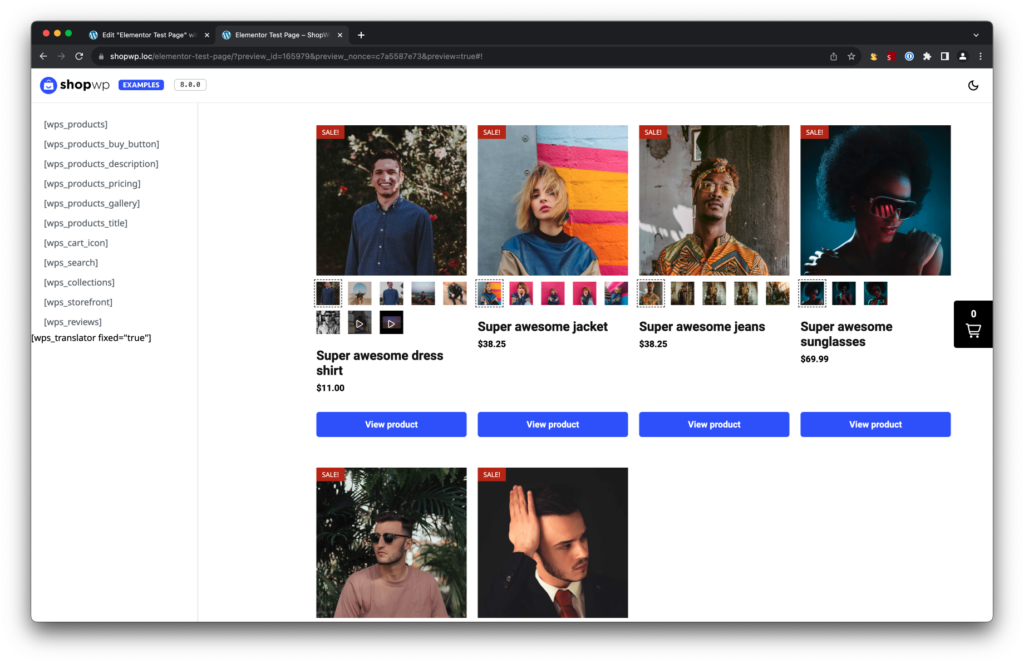
Now let’s view our changes on the frontend.
Cick the “Publish” button in the top right corner to save the changes. Then click the “eye” icon next to the publish button to view the frontend.
Our products layout after customizing using the Elementor widget controls.
Custom product templates
One of the benefits of using Elementor Pro is that you gain access to the Elementor Theme Builder and template editing. You can use this feature to visually build templates for the ShopWP product detail pages. Let’s create one now.
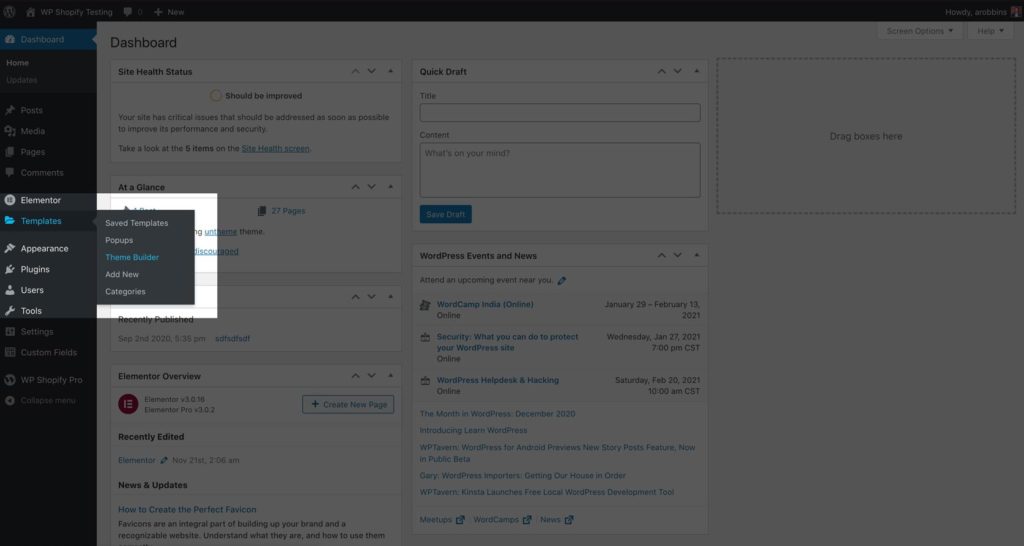
1. Create a new template
Let’s start by creating a custom template by going to Templates - Theme Builder
Elementor Pro provides the ability to customize templates for various content like custom post types.
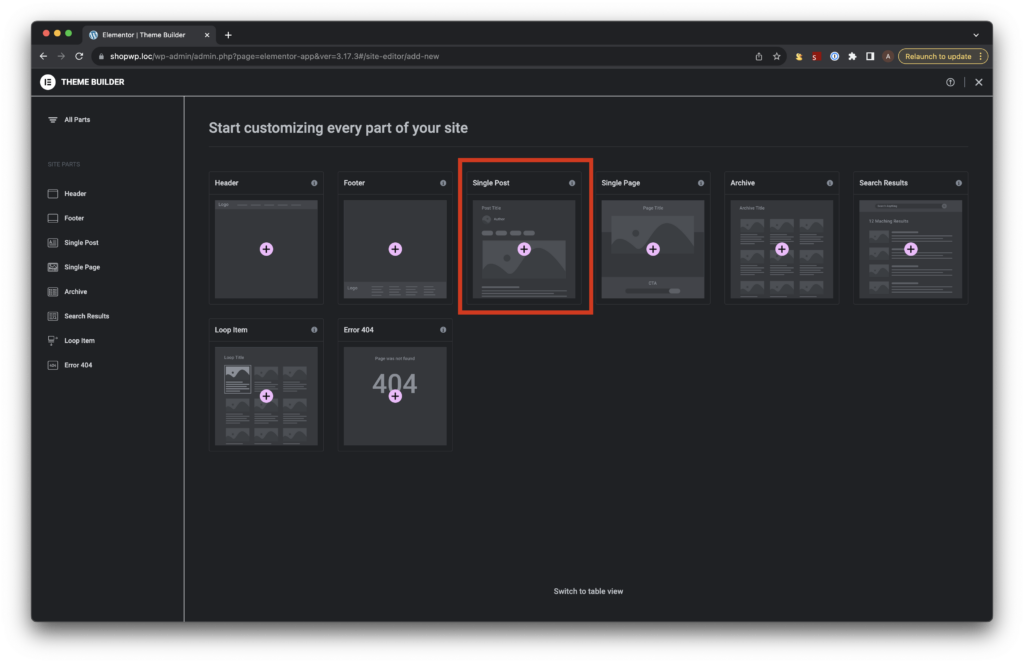
Since we want to create a template for the product detail pages, we’ll select “Single Post” for the template site. Later in this guide we’ll set the conditions of this template so that it only applies to ShopWP products.
Choose Single Post as our starting point
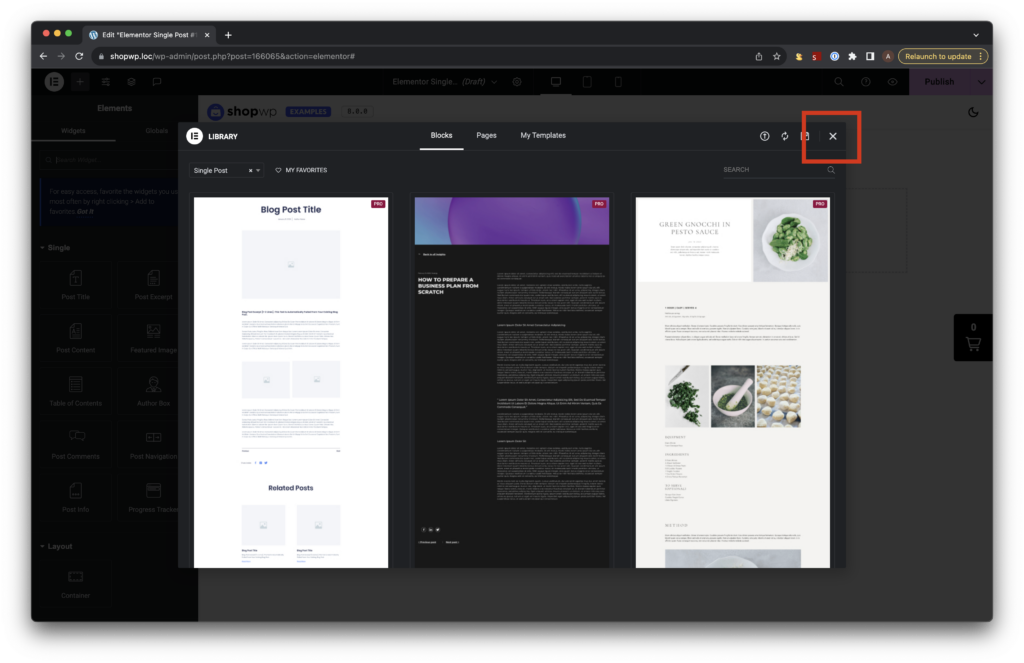
Once the Elementor Library loads you can choose your own pre-made layout or start from scratch. Both options will work. However, we want to start fresh so we can skip adding any existing template. Just exit out of this modal below.
The modal for choosing an existing block or template to use. We can skip this.
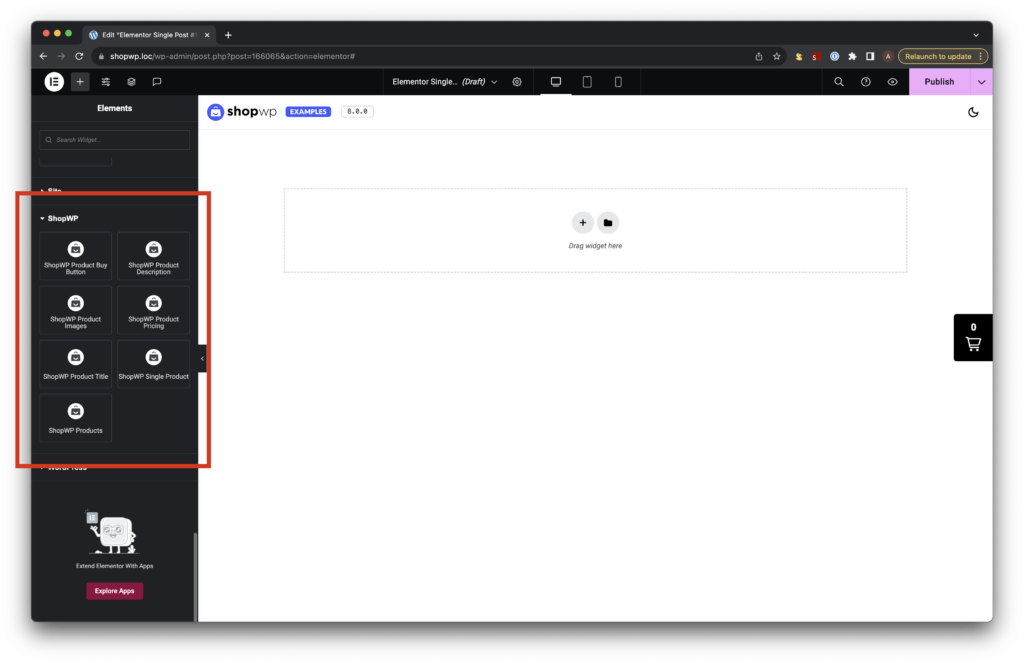
Once the template editor loads, scroll down to the bottom of the widget selection sidebar and you’ll see the list of ShopWP Elementor widgets. We’ll use these to build our product detail page template.
Since we’re creating a Single Post template, the product info will be dynamic depending on which product you’re previewing.
The blank Elementor template editor
2. Start designing your layout
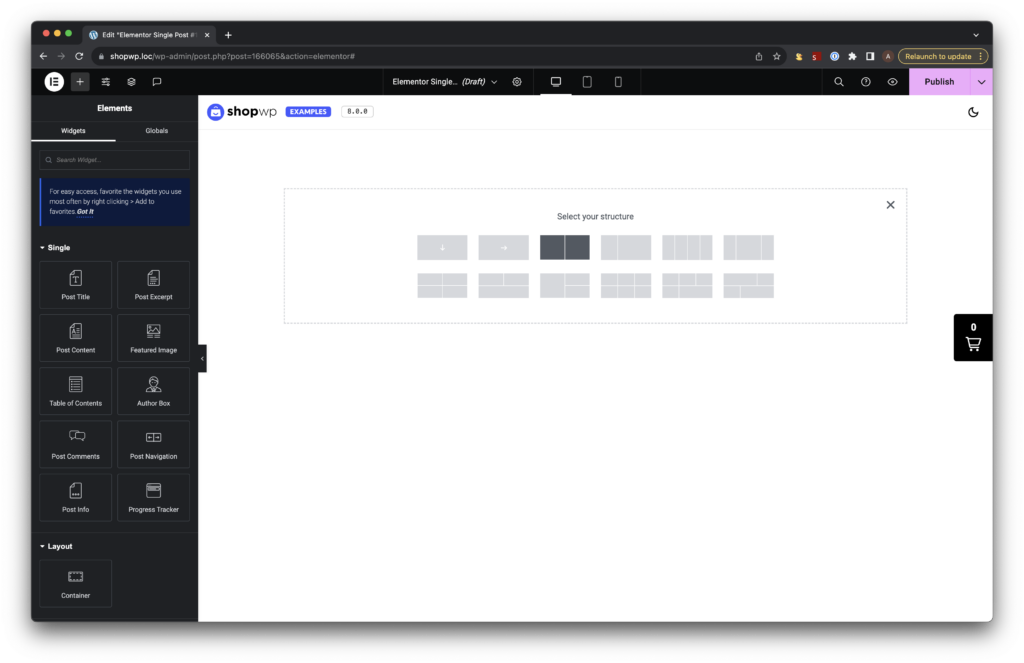
For the purpose of this guide we’ll create a simple two column layout for our product detail template.
First, we’ll add the Elementor “two column” widget to create the structure we need. This will allow us to add our widgets to the left and right columns.
The Elementor two column layout structure
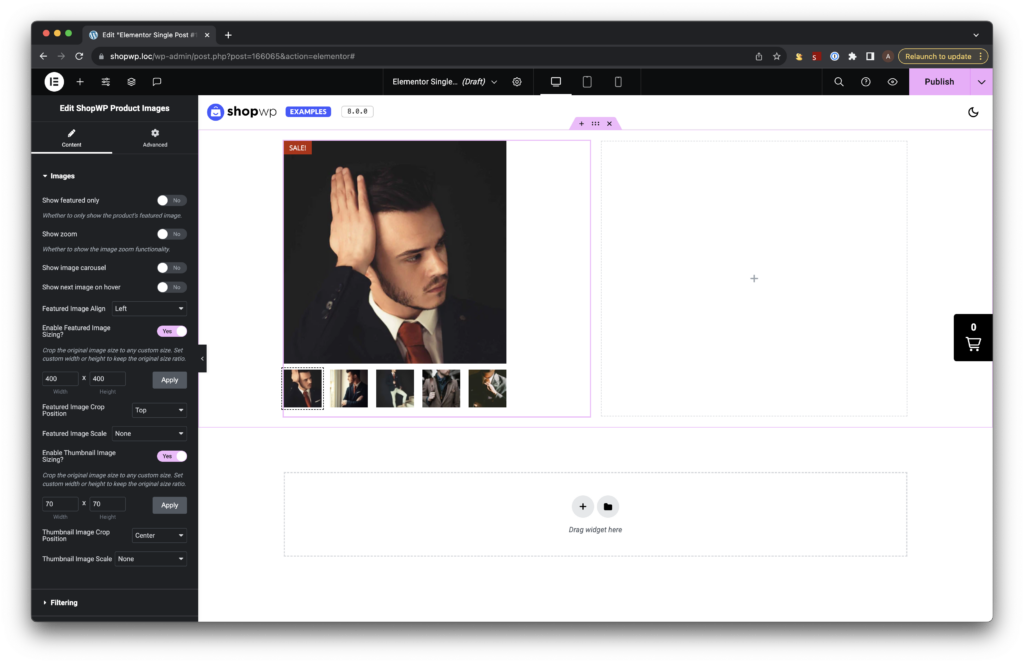
Next, add the ShopWP Product Images widget to the left column:
Adding the ShopWP images widget to the Elementor layout
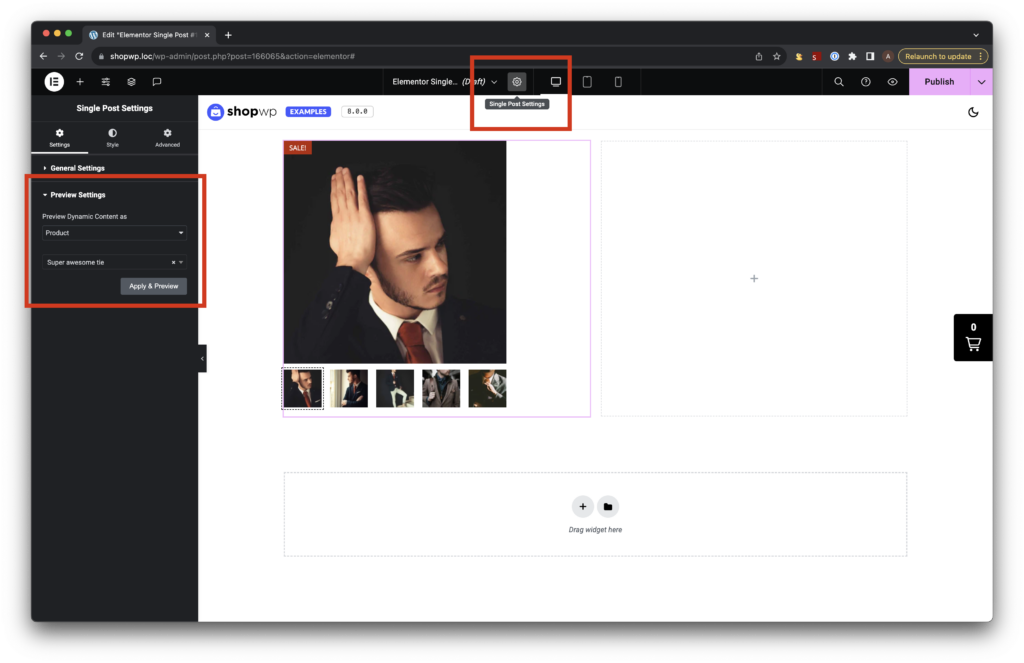
Remember, you can change which product is shown by adjusting the “Preview” settings. Simply click the “Single Post Settings” gear icon and then find the Preview settings in the left hand column.
You can then set the “Preview Dynamic Content as” to Product. From there, you should see a list of your products to select. You can select any product from this list and watch the data dynamically change inside your Elementor layout. This will help you a lot during your design process.
Adjusting which product shows during the preview
Next, let’s and the Product Title widget to the right column:
Showing the product title added to our Elementor template layout.
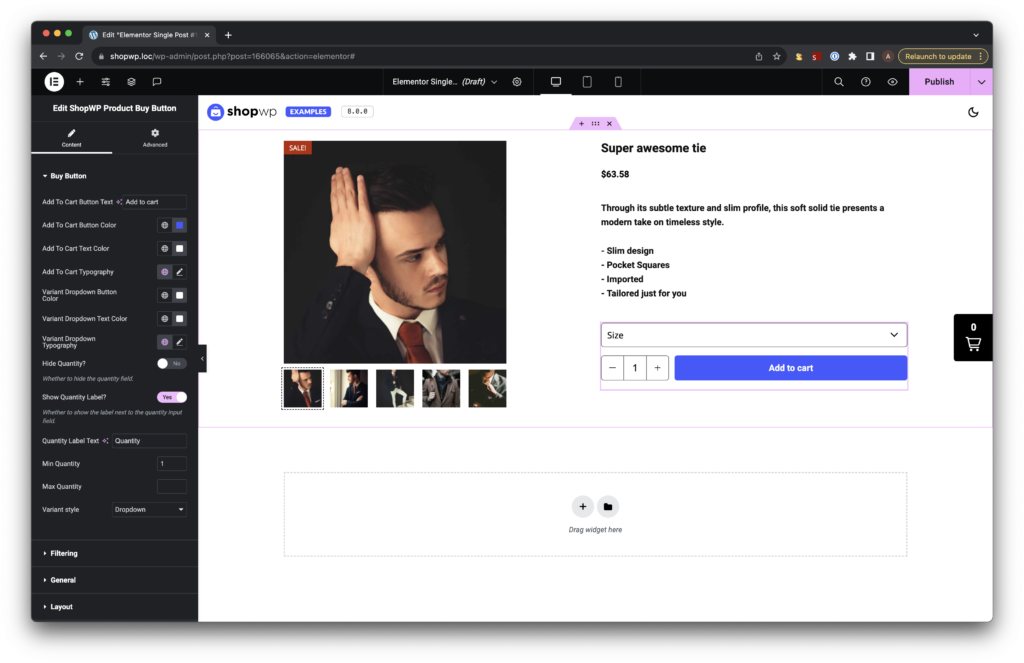
Finally, let’s add the rest of our layout components including the Product Price, Product Description, and Product Buy Button. All of these components can be found in the same place as the other two.
Our layout after adding the remaining product layout components
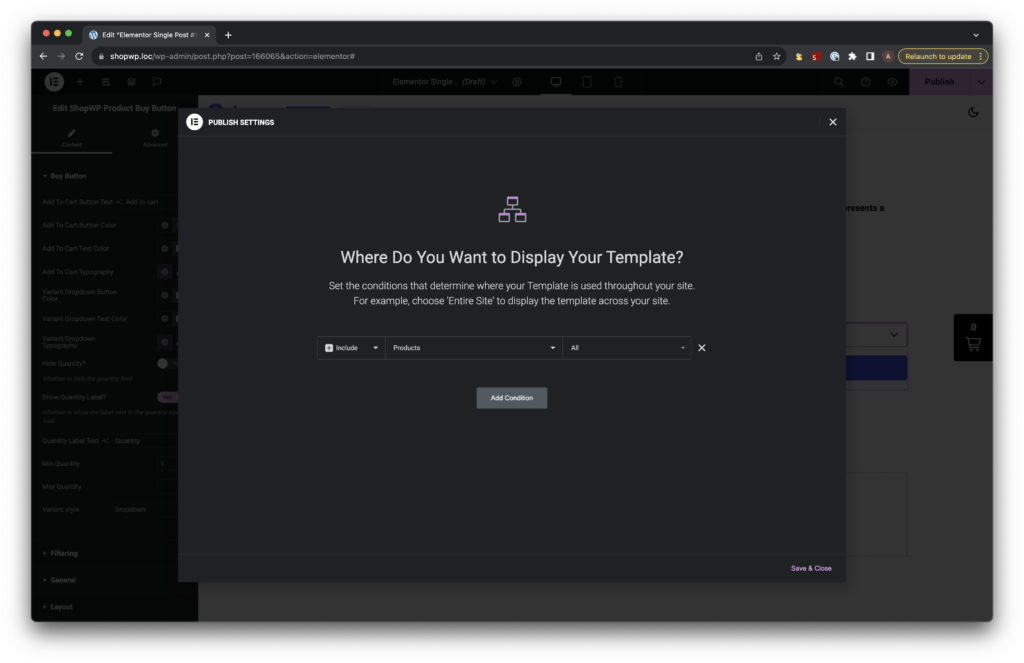
Display Conditions
Before you can use your template you’ll need to configure the “display conditions”. This basically tells Elementor where and how to use the template.
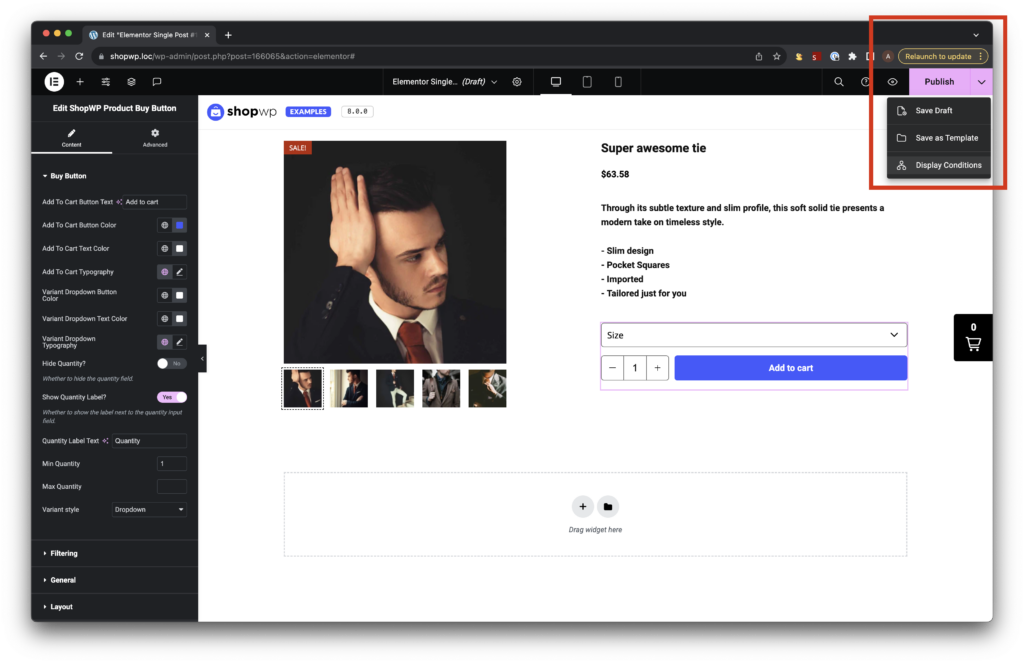
If you’re saving your template for the first time you can just click Publish in the top right corner. This will automatically bring up the display conditions modal window.
Click “Display Conditions”.
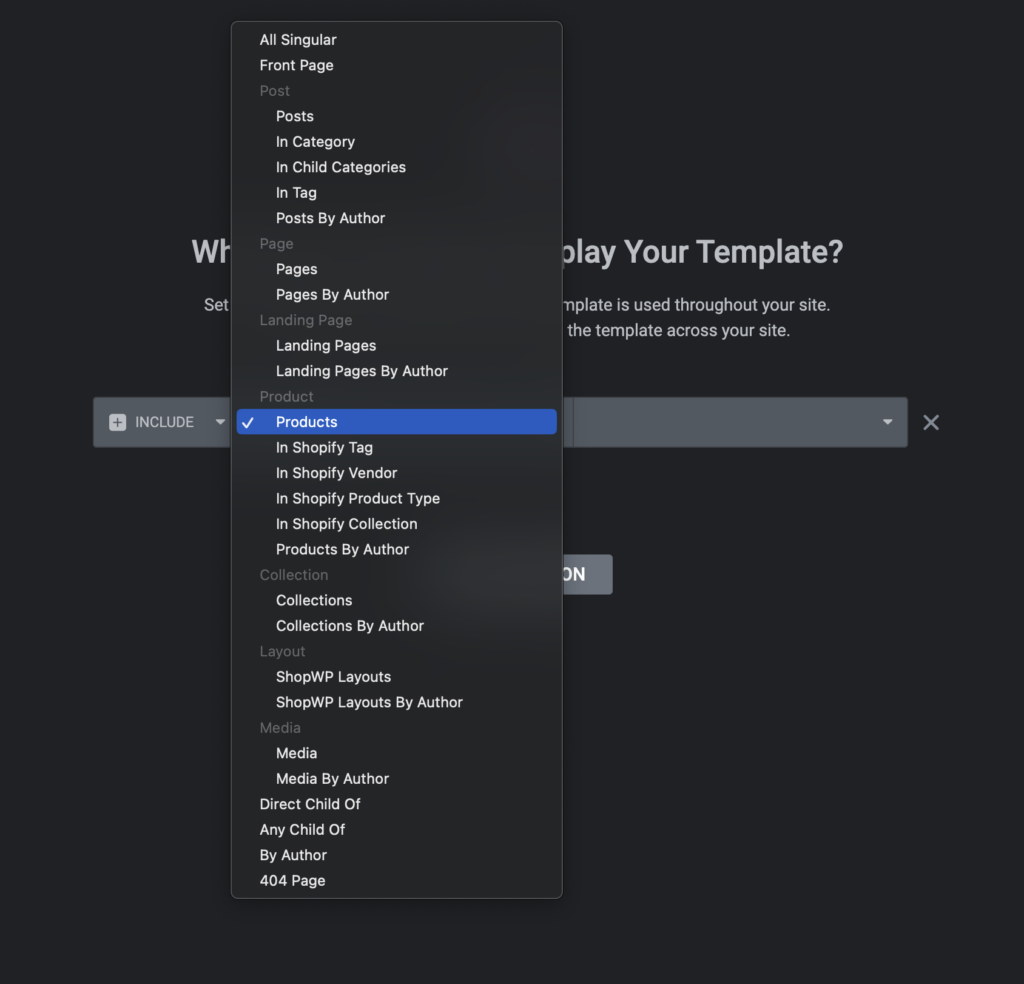
You can then add the condition you want. For our purposes we’ll want to set the template to display for product singular pages only. See below screenshot.
You can also create different Elementor templates and assign them to different products depending on various conditions.
For example, you can create a template that only applies to products with X tag. OR, a template for products assigned to Y vendor AND Z tag.
This essentially allows you to combine display conditions to make more complex layouts.
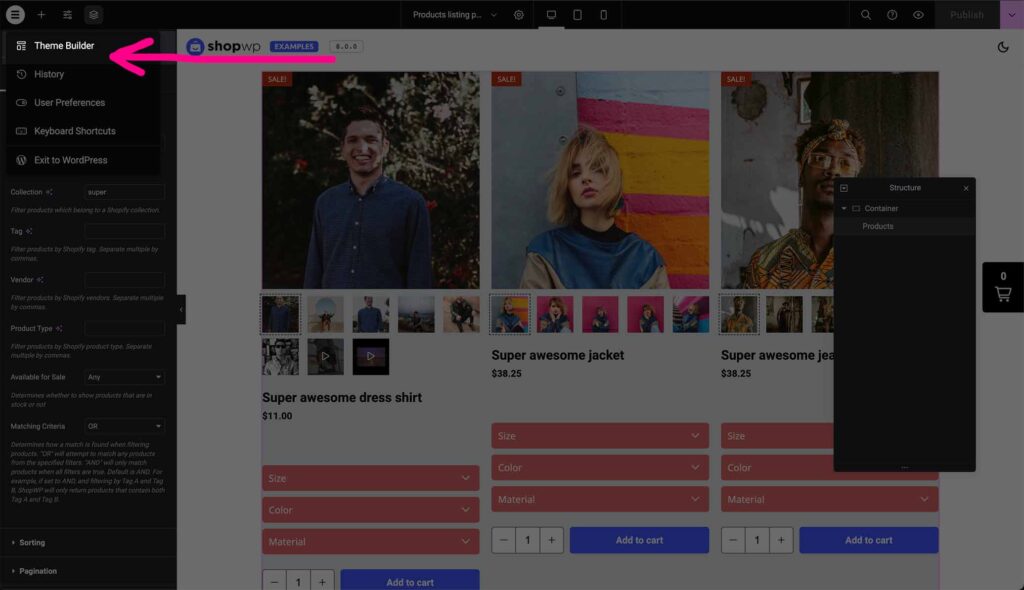
Another way to access the template display conditions is by clicking the Elementor logo in the top left corner and choosing Theme Builder. This will bring you back to the main template listing page.
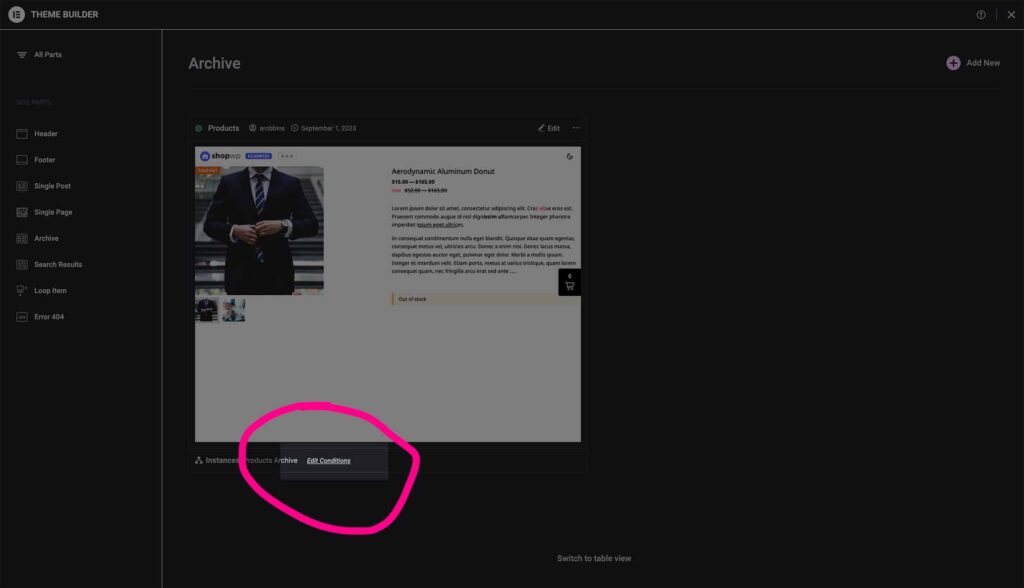
Then click the template you were working on. You should see a small link toward the bottom labled “Edit conditions”.